Thyme Plant Care: The Watering and Trimming Schedule That Prevents Woody Growth

Thyme goes woody without this trimming schedule — four cuts, mapped to season, with exact timing. Includes the harvest window that peaks thymol for better flavor.
Thyme looks like a low-maintenance herb, and in some ways it is — until the day you realise your plant has turned into a sprawling tangle of gray sticks with a tuft of green clinging to the tips. This is woody growth, and it happens to every thyme plant that isn’t actively managed.
The good news is that woody thyme is almost always preventable — and often reversible. The key is understanding that thyme isn’t really a soft herb at all. It’s a woody subshrub from the Mediterranean, and caring for it correctly means working with that biology rather than ignoring it.
This guide breaks thyme care into a clear schedule: when to water (and critically, when not to), and how to apply the right cut at the right time of year to keep your plant bushy, productive, and fragrant. For a full zone-by-zone growing guide including planting, varieties, and winter care in depth, see the thyme growing guide.

Skip the guesswork — get a pre-planned 4×8 kitchen garden bed
Free printable planting plan: what goes where, when to plant it, and how to keep it alive. Plus two bonus flower bed plans.
Why Thyme Goes Woody — and Why the Fix Is Simpler Than You Think
Thyme is a woody subshrub, not a soft annual herb. Every stem it grows gradually turns from pliable green to rigid gray-brown through a process called lignification: the plant deposits lignin — the same polymer that makes tree trunks rigid — into its cell walls. This process is irreversible at the cellular level. Once a stem fully lignifies, the bud sites that would produce new lateral shoots are absent or suppressed, and the stem becomes structurally inert.
What this means in practice: cut back a gray-brown bare stem, and you’ll get nothing back. The stem cannot respond. But catch that same stem while it still shows a band of living green — and the plant has active growth points above the woody section. Cut just above a leaf node in that green zone, and you’ll see new bushy growth within three to four weeks.
The entire strategy for keeping thyme productive long-term comes down to one principle: always stay in the green. As one expert herb grower puts it, shape your upright thyme into a dome and be careful “not to cut too low and to stay in the green.” The three zones to learn before you pick up any scissors:
- Soft green tips — always safe to cut
- Firm green-to-olive stems with visible leaf nodes — safe to cut just above a node
- Gray-brown bare wood with no leaves — never cut here; no recovery is possible

Watering Thyme: Drought-Tolerant Doesn’t Mean Neglect-Proof
Thyme evolved on the dry rocky slopes of the Mediterranean, where rainfall is seasonal and drainage is instant. Its roots expect soil to dry out completely between waterings. What they cannot tolerate is prolonged saturation.
When soil stays waterlogged for more than 24 to 48 hours, oxygen is displaced from the root zone. This creates the anaerobic conditions that water-borne soil pathogens like Phytophthora and Pythium require to colonize roots. Neither pathogen can establish in healthy, well-oxygenated soil. The result — root rot — is silent until it’s too late: the first visible sign is often sudden wilting on an otherwise healthy-looking plant, even though the soil is wet. If you water a wilting thyme before checking the soil, you’ll accelerate its decline rather than rescue it.
In-ground thyme: in most US climates, water every 10 to 14 days during the active growing season and let spring rains do the work. During summer heat waves, you may need to water weekly. During winter dormancy in zones 5 to 7, one deep watering per month is sufficient. In zones 8 and warmer, follow the same dry-between-waterings principle year-round — winter rains often handle it without any intervention from you.
Container thyme: pots dry out faster than garden beds and are at higher risk for both overwatering and underwatering. Check the soil by pushing your finger about 2 to 3 cm (roughly an inch) into the mix. Water only when that depth is completely dry — approximately once a week in hot summer weather. Mix 25 to 30% horticultural grit or coarse perlite into the potting medium to replicate the fast-draining conditions thyme naturally expects; the RHS recommends up to 25% grit by volume for pot-grown thyme.
One diagnostic shortcut: in underwatered thyme, leaves look crisp and dry. In overwatered thyme, leaves look limp and gray-green — and when you push a finger into the soil, it’s still damp. I’ve seen gardeners water a wilting thyme and speed its decline simply because they didn’t check the soil first. Always check before adding water.
The Four-Cut Trimming Framework
Most guides tell you to trim thyme. Few explain that there are four distinct cuts — each with different timing, depth, and purpose. Using the wrong cut at the wrong time is a direct path to the woodiness you’re trying to avoid.
Cut 1 — Spring Shaping (March to April)
Purpose: Remove dead or frost-damaged growth; reset plant shape before the season’s growth accelerates.
How: Wait until you can see new green growth appearing at the base or low on stems — this signals the plant is actively growing again. Remove any completely dead stems at the base. Then shape the plant by cutting 1 to 2 inches above the line where green meets gray-brown wood. Remove up to one-third of the plant’s total volume. Never cut below the green line. For upright varieties, aim for a rounded dome shape rather than a flat-top.
Cut 2 — Pre-Bloom Harvest (May Through Early Summer)
Purpose: Culinary harvest at peak thymol concentration; prevents the plant from directing all its energy into seed production rather than leaf production.
How: Harvest individual stems as needed, cutting to about 1 to 2 inches above the woody base — always leaving at least 5 inches of green material on each stem. Research on Thymus vulgaris shows that thymol concentration reaches its highest point during full bloom (62.46% in dried material), but the combination of thymol with its biosynthetic precursor compound γ-terpinene — which is most abundant at the very beginning of flowering — produces the strongest overall biological activity. For the best culinary result, harvest just as the first buds are opening. You can repeat light harvests every two to three weeks while the plant is actively growing.
Cut 3 — Post-Flowering Trim (Late Summer, After Flowers Fade)
Purpose: Remove spent flower stems; redirect energy back to foliage; keep plant compact heading into autumn.
Stop missing your zone's planting windows.
Select your US zone and month — get a complete checklist of what to plant, prune, feed, and protect right now.
→ View My Garden CalendarHow: This is a light trim — deadhead spent flowers and take off the top third of stems that have finished flowering. Do not cut hard into old wood at this stage. Avoid any heavy pruning in late summer or early autumn: this stimulates tender new growth that won’t have time to harden before the first frost, which reduces overall winter hardiness and can kill the new shoots outright.
Cut 4 — Rejuvenation Pruning (Late Fall, Optional)
Purpose: Rescue a plant that is becoming woody, or prevent an established plant from reaching that point.
How: After the first frost, select the oldest and most woody one-third of stems. Cut these back by half, cutting just above any visible green buds or leaf nodes. Leave the remaining two-thirds of the plant completely untouched. Repeat the following year on the next generation of oldest stems. After two to three growing seasons of this progressive approach, you’ll have replaced most of the old wood with productive young growth. Stop all harvesting three to four weeks before your expected first frost to allow any tender cut-ends to harden before cold arrives.
Seasonal Care Calendar
| Season | Zones 5–6 | Zones 7–9 | Key Task |
|---|---|---|---|
| Early spring | After last frost (Apr–May) | Feb–Mar | Spring shaping; remove dead tips; shape to dome |
| Late spring–early summer | Pre-bloom harvest; watch for drought | Earlier bloom window (Apr–May) | Harvest stems at bud stage for peak flavor |
| Summer | Water weekly if >85°F; light harvests | Afternoon shade in heat; same watering rule | Don’t allow soil to stay dry more than 2 weeks |
| Late summer | Post-flowering trim (Aug–Sep) | Same; timing may shift earlier | Light deadhead only; no hard cutting |
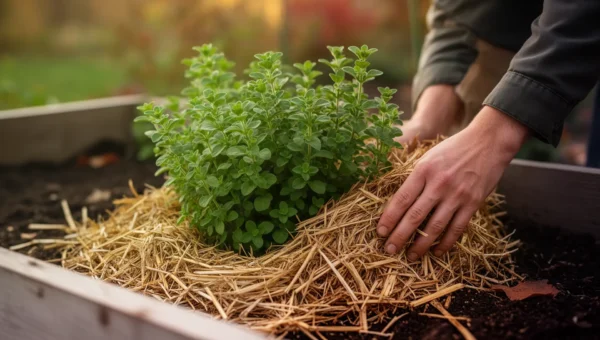
| Fall | Stop harvest 3–4 weeks before frost; mulch 2–3 in | Mulch lightly; skip in zone 8+ | Straw, pine needles, or shredded leaves around crown |
| Winter | One deep watering per month | Reduce watering; plant may stay evergreen | Do not fertilize; do not prune |
For UK and northern European gardeners: the RHS rates common thyme as H5 (hardy to −15 to −10°C), which means it’s fully hardy throughout most of the UK including severe winters. The late-summer pruning caution applies equally here — avoid cutting hard after August. Move container thyme against a sheltered south-facing wall in zones rated below H5.

Fertilizing: When Less Is More
Thyme doesn’t just tolerate poor soil — it produces better-tasting leaves in it. Excess nitrogen pushes the plant to produce fast, floppy, leafy growth at the expense of the essential oils that give thyme its flavor. Penn State Extension notes that once established, thyme “does not require much watering or any fertilizer.” UF/IFAS Extension confirms that over-fertilizing leads directly to reduced leaf flavor.
In-ground thyme: no fertilizer at all. The lean soil is doing exactly what you need it to do.
Container thyme: pots gradually deplete nutrients through repeated watering, so some replenishment is needed. Apply a half-strength balanced liquid feed once in early spring when new growth appears, and once in early summer before peak production season. That is the maximum — skip fall and winter feeding entirely.
One exception worth knowing for established evergreen varieties: herb grower Jekka McVicar recommends a small dose of magnesium sulfate (Epsom salts dissolved in water) applied in late spring after trimming to strengthen new growth. In practice, about one tablespoon per gallon is the standard rate. Thyme, rosemary, lavender, and sage all respond well to magnesium — it’s a trait shared across the Lamiaceae family.
When Thyme Is Already Woody: Rejuvenate or Replace?
Run your fingers along every stem on the plant. If you can find green tissue anywhere — even a small cluster of leaves near the base of an otherwise gray stem — rejuvenation is possible using the Cut 4 progressive approach described above. Take your time: the two-to-three-year method is far more reliable than a single hard cut, and it avoids the shock of removing too much at once.
If the entire plant is gray-brown from base to tip with no green visible anywhere, rejuvenation isn’t realistic. Woody stems without any green cannot produce new growth. At that point, replacement is the better path — and thyme makes it easy and free. In spring, take 4-inch cuttings from any green shoot tips you can find, strip the lower inch of leaves, and root them in a sand-based medium. Within four to six weeks you’ll have new rooted plants ready to pot up. The RHS recommends this directly: “After several years, shrubby thymes can become straggly, so take cuttings or layer them to grow replacement plants for free.”
For more on diagnosing and solving thyme problems once they appear, including pest identification and disease, see the thyme problems guide.
Frequently Asked Questions
How do I know if I’ve accidentally cut too deep into old wood?
Look at the cut surface. If the inside of the stem is green or whitish-green, you’re in live wood and buds below may still respond. If the inside is pure tan or gray with no green, you’ve hit bare wood. If you realise this mid-cut, stop at that point. Whatever green remains above the cut will continue to grow, and if any live tissue is left below, a recovery shoot may still emerge over the following weeks.
Can thyme recover from overwatering?
Early-stage overwatering can often be reversed: stop watering completely, improve drainage if possible, and let the root zone dry out fully for one to two weeks. If root rot has set in — revealed by dark mushy roots and an unpleasant smell when you dig down — recovery is unlikely. For harvesting tips and how to extend the harvest season, see the dedicated guide.
Does container thyme need more hands-on care than in-ground thyme?
Yes, in three specific ways: more frequent watering checks (containers dry faster), twice-yearly half-strength liquid feed (pots deplete nutrients), and winter protection (move containers against a sheltered wall or into an unheated greenhouse in zones 5 to 6). A terracotta or clay pot is preferable to plastic — the porous walls wick away excess moisture and reduce the risk of waterlogging.
Sources
- How to Grow Thyme — Royal Horticultural Society
- Herb Garden Plants: Thyme — Penn State Extension
- A Beginner’s Guide to Growing Thyme — UF/IFAS Extension Pasco County
- Flowering Phenophases Influence the Antibacterial Effects of Thymus vulgaris Essential Oil — BMC Complementary Medicine and Therapies (2023)
- Herbs: General Care — Clemson HGIC
- Pruning Thyme: How to Trim Thyme Plants — Gardening Know How
- Woody Herb Pruning Guide — Gardening Know How
- Thyme Plant Care: Pruning, Watering & Fertilising — Plantura
- Thyme to Get Pruning — Jekka’s
- Seasonal Care Tips for Thyme Plants — Grow Organic