Beyond the Bulb: The Complete Guide on Growing Onions for Continually Available Supply
Imagine yourself in the kitchen beginning dinner. Like many excellent recipes, this starts with a basic onion. You go to your garden instead of reaching for your supply, instead of dragging one from a mesh bag from the grocery shop. You ignore the dirt and pluck a firm, beautiful onion from the ground, its green top aromatic and papery skin shining. That planted onion will taste and smell quite different from anything you have ever bought.
If that seems like a gardener’s dream, I’m here to let you know it’s not only realistic but also simpler than you would expect. For any home gardener, learning how to grow onions is a real game-changer, turning an everyday kitchen basic into a gourmet experience. The key is about selecting the correct type of onion for your particular region and the appropriate planting technique for your objectives, not about some lost bit of ancient knowledge.
We will demystify the whole procedure in this book. From little “sets,” young “transplants,” or from seeds themselves, we will discuss the three methods to grow them. We’ll open the key “daylight secret” that controls your success, and I’ll lead you through everything from planting to harvesting and curing your onions for months of great storage. Prepare to produce the greatest onions you have ever come across.
Onion Day-Length: The Key to Big Bulbs
We should discuss the most important element in onion growing before you start any project: the one that divides a crop of lovely, big bulbs from a disappointing one of thick-necked scallions. That hidden secret is day length.
Onions’ Golden Rule
Unlike many plants that bloom depending on temperature, an onion’s internal clock is set to begin developing a bulb depending on the amount of sunshine hours it gets. The shorter, cooler days of April see the growth in the leafy green tops. Once a particular day-length threshold is reached, the plant’s energy moves from producing leaves to inflating the base of those leaves into a bulb. For the plant, this is an absolute trigger not negotiable. A cultivar you plant that is inappropriate for your region’s sunshine hours will never develop a good bulb. That’s really straightforward.
It operates as follows:
- Onions from Long Days The northern giants are these ones here. Bulbs start to form in 14 to 16 hours of daylight. These are the onions for you if you are a gardener in the northern half of the US (about north of a line extending San Francisco, CA, to Richmond, VA—or USDA Zones 6 and colder). Variations in classics: Paterson, Yellow Sweet Spanish, Walla Walla.
- Short Day Onions These types are designed for the south. They achieve bulbing during the mild winters and early springs in southern climes; they just need 10 to 12 hours of daylight to do this. These are your pass to success if you dwell in the southern US (south of that same San Francisco-to- Richmond line). Classic variances: Texas SuperSweet, White Bermuda, Red Creole, Grano are classic variances.
- Day-Neutral, or intermediate-day onions Those who live in the middle of the nation, roughly in a band spanning USDA Zones 5 and 7, should choose this flexible group. Given their need for 12 to 14 hours of daylight, they are a safe choice for most gardeners. Classic varieties: Candy, Red Amposta, Sierra Blanca are classic varieties.
Why It Counts?
Let me be very clear: if you plant a Walla Walla onion (a long-day kind) in Florida, a short-day location, you will get beautiful, lush green tops; but, the summer solstice will pass before the 14-hour daylight trigger is ever satisfied. Hence, no bulb. On the other hand, if a gardener in Maine—a long-day area—plants a Texas SuperSweet, a short-day onion, the 10-hour trigger will be satisfied so early in the season that the plant will only have few leaves, producing a little, marble-sized bulb. Before you buy any onion variety, always find out its daily length.
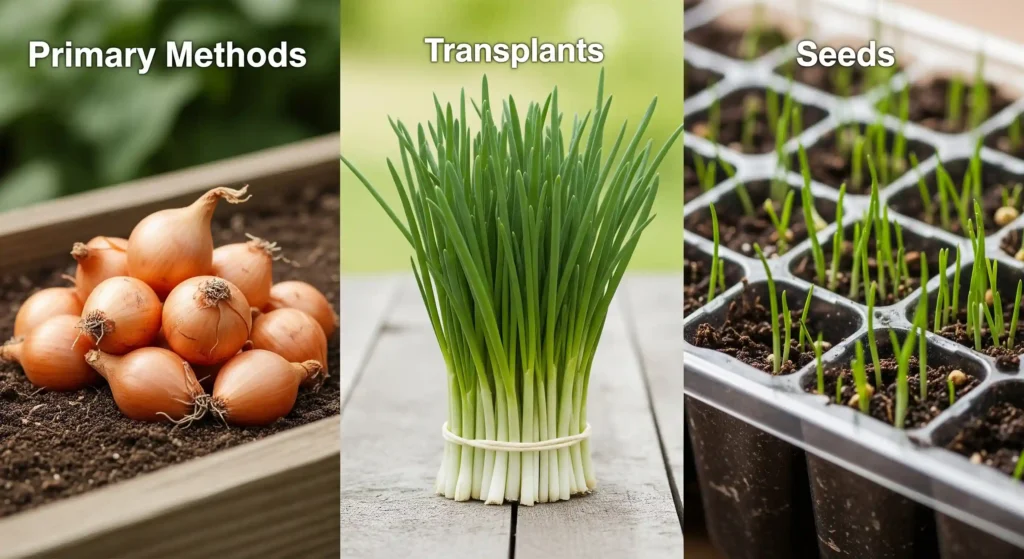
Sets, transplants, seeds—the Three Paths to a Perfect Onion Harvest?
Knowing the day-length will let you decide how to plant. Every approach has advantages and disadvantages; the optimal one will rely on your objectives and degree of experience.

Method A: Growing onion sets—the fastest and easiest approach
Onion sets are tiny, immature onion bulbs produced from seed the previous season and thereafter put under dormancy. Imagine them as half grown onions, just waiting to blossom once more.
- Benefits: This is by far the easiest approach for novices. They have the shortest period to harvest, are rather plentiful and dependable. They are also quite good for rapidly generating green onions—scallions.
- Cons: Your range of choices is usually just plain “yellow,” “red,” or “white” groupings. If they have temperature variations, they are more likely to bolt—that is, send up a flower stalk—because they are basically in their second year of growth. They also store less than onions produced from seed or transplants.
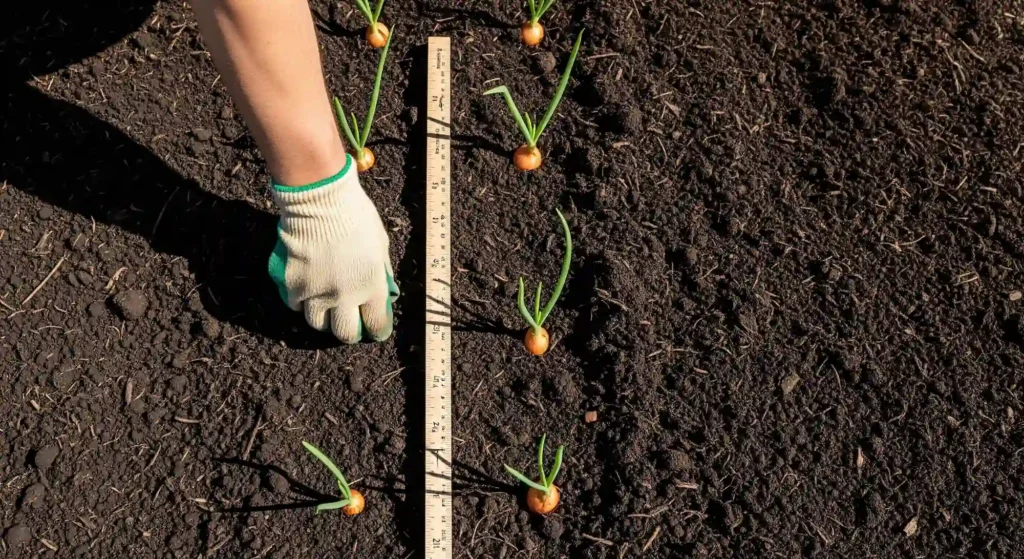
- Plant: early spring, as soon as your soil is workable, just press the tiny bulbs—with the pointed end facing up—into the ground 1 to 2 inches depth. For big bulbs, space them 4–6 inches apart.
Method B: Onion Transplanting—the Best of Both Worlds
Transplants are immature onion seedlings begun in a greenhouse early in the season. Usually offered in bundles, they resemble tiny scallions.
- One advantage of this approach is a fantastic mix of quality and convenience. You have access to a far greater range of particular sorts, including the big, sweet types and great storage onions, and you start the season really well. They run consistently and generate more bulbs than sets.
- Cons: Only found in early spring from nurseries or mail-order sellers, they can be more costly than sets or seeds.
- Plant: You might like to cut the green tips down to roughly 4-5 inches and the roots to roughly half an inch upon arrival of your bundle. This lessens the shock of a transplant. Plant each seedling one to two inches deep, therefore strengthening the ground around it.
Method C: Starting Onions from Seed (The Ultimate in Variety & Storage)
What They Are: Starting your onions from scratch exactly like any other vegetable, this is the conventional way.
- This is the road taken by the committed gardener. You will never find as sets or transplants hundreds of unusual heritage and specialized types that it provides access to. Growing a lot of onions also is the most reasonably priced approach.
- Unmatched diversity, lowest cost, and—most importantly—onions grown from seed yield the toughest, densest bulbs with excellent long-term storage potential.
- Cons: This approach calls for the longest growing season and most effort. Most regions call for starting the seeds inside many weeks before the date of last frost.
- Starting inside, plant seeds in a flat or pot loaded with seed-starting mix ten to twelve weeks before your usual last frost. Cover lightly with dirt and keep damp. The seedlings will emerge as long, grassy threads. Give them a “haircut” with scissors, cutting them down to roughly 3 inches tall anytime they get long and floppy, therefore promoting robust, stocky development. After your final frost, move them into the garden.
Planting and tending to your onions from soil to sprout
It’s time to provide your selected onion kind and planting technique the ideal habitat for growth.
Site Choice and Soil Preparation
Surprisingly heavy feeders, onions also want two things above all else: rich, loose, well-draining soil and full daylight (at least six to eight hours of direct sunlight every day). They won’t work well in compacted or hard clay. Generously change your garden bed with 2-3 inches of well-rotted compost or aged manure before planting, then till the top 6-8 inches of soil. Perfect pH is slightly acidic—between 6.0 and 6.8.
Planting times: when?
Plant sets and hardy transplants early in spring as soon as the ground can be worked upon—that is, when it is no longer frozen. They have rather low tolerance to cold. Starting your own seedlings indoors, wait to move them into the garden until after the risk of harsh frost has passed.
For Success: Spacing

Remember this basic rule: the size of the onion bulb’s green top determines exactly its ultimate size. More leaves signify a bigger bulb since every leaf relates to one ring of the onion. You have to give those enormous toppers room if you want them. Space your large, full-sized bulbs 4–6 inches apart in rows spanning 12–18 inches. This allows every plant lots of space to flourish free from competition from its neighbors.
Hydration
With their very shallow, ineffective root systems, onions cannot reach deep into the ground for moisture. To flourish, particularly during the bulbing phase, they so depend on constant hydration. Try to give them roughly one inch of water—including rainfall—per week. Bulb development can stop if the soil dries out; if a rapid surge of water follows a dry time, the bulbs can split.
Enhancing
You have to feed your onions if you want those large, green tops that produce huge bulbs.
- Feed them a fertilizer high in nitrogen to encourage robust foliage development in the first month or two following planting.
- Once you see the base of the plant starting to swell—the beginning of bulbing—change to a fertilizer lower in nitrogen and higher in phosphorus and potassium to help bulb development. Once the tops start to slink, stop fertilizing.
Weeding is non-negotiable.
I cannot stress this enough: onions struggle against weeds. Their straight, thin leaves offer no cover to stifle rival plants. Weeds will rob nutrients, sunshine, and water, so producing much smaller bulbs. You have to keep ahead of weeding. Their roots are extremely shallow, hence grow very carefully to prevent damage to the bulbs. Applied following the establishment of the plants, a thick, 2-3 inch layer of straw mulch is a great approach to control weeds and preserve soil moisture.
Harvesting, curing, and storing your onions—the Grand Finale
You have reached the most fulfilling point following a season of care. Enjoying your crop for many months to come depends on getting these last stages perfect.
Knowing When to Bring In Harvest
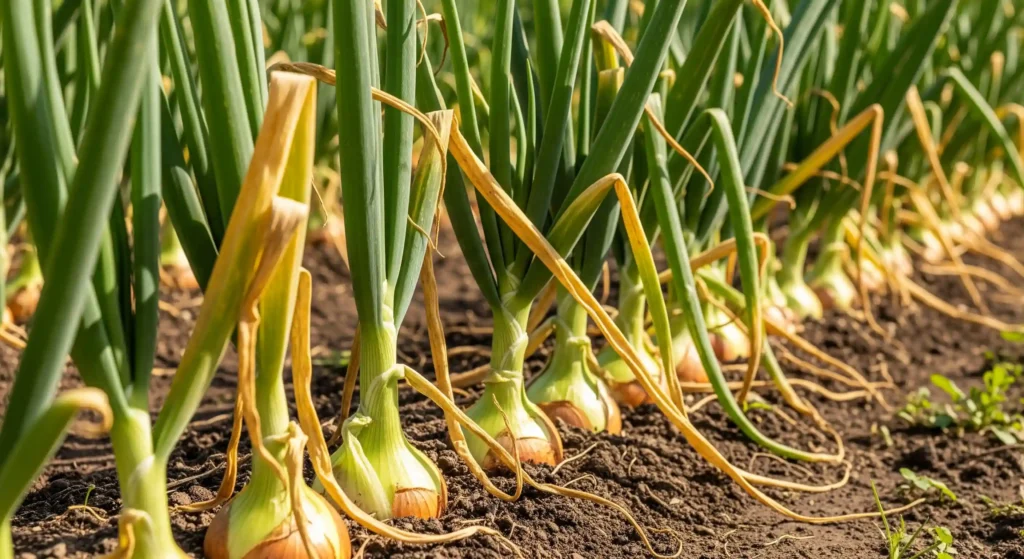
Once your onions stop growing, they will provide you a really clear signal. Towering all season, the green tops will start to yellow and flop over at the neck. This is the plant alerting you that it is shutting down after devoting all of its energy to the bulb. To speed the last ripening process, gently bend the tops down manually once half of your crop has fallen over.

Harvest:
Choose a dry, sunny day for gathering. Using a garden fork, gently loosen the dirt surrounding the bulbs then pull them from the ground. Be moderate! Onions that are bruised won’t keep very well. Though you should not wash them or remove the outer skins, gently shake off any extra soil.
Curing: The Most Crucially Important Action for Storage
Making your onions last is mostly dependent on this. The slow drying process known as curing lets the outer skins grow dry and papery and lets the onion’s neck seal totally. This barrier of protection keeps moisture and bacteria out and stops rot from starting. Lay your just picked onions on a single layer in a warm, dry, well-ventilated area free from direct sunlight and rain. Perfect places are a covered porch, a dry garage, a wire rack in a shed. Let them sit two to three weeks.
When Are They Prepared?
When the necks are totally dry, without any wetness when you pinch them, and the outer skins are crisp and rustle when you hold them, you will know they are totally cured.
Stashing for the Winter
You can get them ready for storage once totally cured. Cut the roots from the bottom and the dry tips down to roughly one inch with scissors. Ideally between 40 and 50°F (4–10°C), a cold, dark, dry room is the optimal storage environment. Works well is a basement, cellar, or unheated garage. Storage Techniques: Key is good airflow. Just drop an onion in, tie a knot, drop another, tie a knot, and so on—store them in mesh bags, open containers, or pantyhose. Additionally leave the tops long and braided into exquisite, classic onion ropes.
A Note on Sweet Onions: Recall that sweet onions—such as Texas SuperSweet or Walla Walla—have more water content and do not keep as long as pungent, store-type onions. Use your sweet varieties first 1-3 months; keep the strong ones for later in the winter.
In essence, a pantry full of possibilities.
Reticently stand back and appreciate your work. You have turned a little seed, set, or transplant into a pantry stocked with a basic cooking component. You have cultivated the ground, learnt the mysteries of the daylight in your area, and gently led your crop from a green shoot to a nicely cured bulb. Knowing the secrets of day-length and appropriate curing can help you to become a master gardener in your own yard. This act of self-sufficiency brings great gratification as well as a taste in every slice that just cannot be purchased.
FAQ: Your Top Onion Growing Concern Questions Answered
Why did my onions show a bolt, or flower stalk?
Usually resulting from environmental stress, most usually from a period of protracted cold weather following the plant’s commencement of growth, bolting is the process by which the plant sends up a flower stalk. An onion bolts not a larger bulb but rather uses its energy to create seeds. Though it will not store well and has a hard core up the center, the bulb is still delicious. Start with any bolted onion initially.
Why do my onion bulbs seem so little?
This is a widespread annoyance with some perhaps valid reasons. The first is choosing a day-length type inappropriate for your location. Other reasons could be planting too late in the season, not allowing adequate room for the plants, too much weed competition, or uneven water and nutrients.
Can I chew on my onions’ green tops?
Right! For a light onion taste in salads, soups, and other foods, the green tops are great and can be used exactly like scallions or chives. Just be careful not to gather too many leaves from one plant since every leaf adds energy to determine the size of the ultimate bulb. A few here and there snipping is quite OK.
An onion and a scallion or bunching onion differ in what way?
Although any onion’s green tops can be used as a scallion, real scallions—also known as bunching onions—are particular kinds of onion cultivated not to produce a big bulb. Their whole concentration is on creating long, savory green stems. Specifically grown for their big, inflated bulb at the base, bulb onions—the subject of this guide—are grown.
Sources
This article draws upon established horticultural science and research to provide comprehensive guidance on growing onions. The information presented is supported by the following academic texts, university extension publications, and scientific studies:
- Boyhan, G. E., Granberry, D. M., & Kelley, T. W. (2009). Onion Production Guide. University of Georgia Cooperative Extension.
- Brewster, J. L. (1994). Onions and other vegetable Alliums. CAB International.
- (Note: This is a foundational academic textbook. A direct public PDF link is typically not available. It can be accessed through academic libraries, institutional databases, or purchased from booksellers like CABI Digital Library.)
- Copeland, L. O., & McDonald, M. B. (1995). Principles of Seed Science and Technology (3rd ed.). Chapman & Hall.
- (Note: This is a foundational academic textbook. A direct public PDF link is typically not available. It can be accessed through academic libraries, institutional databases, or purchased from booksellers.)
- Currah, L., & Proctor, F. J. (1990). Onions in tropical regions (NRI Bulletin No. 35). Natural Resources Institute.

