Your Tomato Season Isn’t Over: 7 Smart Things to Do With End-of-Season Plants
Your once-vibrant tomato jungle, which has been the cause of so much summer delight, is beginning to look a little worn as the air gets crisper and the days seem to be substantially shorter. This is the mixed ending of a great season. But now what? You wonder as you gaze at those spreading vines loaded with a mix of ripe and green fruit. You basically let them be until they fall apart? Bring them straight away? And with that pile of green tomatoes still hanging to the vines, what on earth do you do?
About far more than just cleanup, knowing what to do with tomato plants at end of season is the last, vital step to a good crop. The straightforward response is that you can still get more from your harvest; the choices you make now will directly affect the condition and output of your garden next year. This marks the change; it is not the end. It’s the time a decent gardener turns into a great one by considering the future.
From rescuing every last tomato to turning your old plants into “black gold” for your garden, this guide will walk through a whole end-of-season checklist. We will show you that your preparation for the next season starts right at the end of this one.
Reading the Signs: When is the Tomato Season Officially Over?
Finding when to call this procedure one of the toughest challenges of all. Move too early, and you might pass on some more weeks of ripening. Wait too long; a sudden cold could destroy your surviving crop. Two main considerations—the thermometer and the condition of your plants—base the decision on a judgment call.
The Temperature Trigger
The first frost date for your area marks your main, non-negotiable indication. At their core, tomatoes are sensitive tropical plants; they have no tolerance for frost. One should realize that a light and a hard frost differ in several ways. Though it might not affect the fruit itself, a light frost (32°F to 29°F / 0°C to -1.5°C) will injure the leaves, blacken and wither them. The real season-ender is a strong frost—below 28°F / -2°C for several hours. It will completely destroy the plants and render any tomatoes left on the vine mushy, useless garbage. Before that severe cold strikes, you want everything picked and disinfected.
Plant Health Signals
Your plants themselves will alert you they are running out of steam even before the threat of cold. All summer they had worked hard! Look for these markers of natural senescence:
- Widespread yellowing of the lower leaves unrelated to any one illness is a clear indication the plant is slowing down.
- Reduced development: New flower development will noticeably slow down; the blossoms that do show may not set fruit.
- The plant simply seems worn down overall. The stems lose their vivid, rich green look of mid-summer and seem more fragile. These indicators tell you the plant is not getting bigger but rather is using its residual energy to ripen the last of its fruit.
The Green Tomato Gold Rush: Gathering Tomatoes Before Freeze
That nearing frost date does not mean you have to give up all those underripe tomatoes. Actually, it offers a “bonus harvest” possibility. Let not one of those green tomatoes go to waste! Ripening them indoors is a time-honored gardener’s custom; they are a great, adaptable end-of-season delicacy.

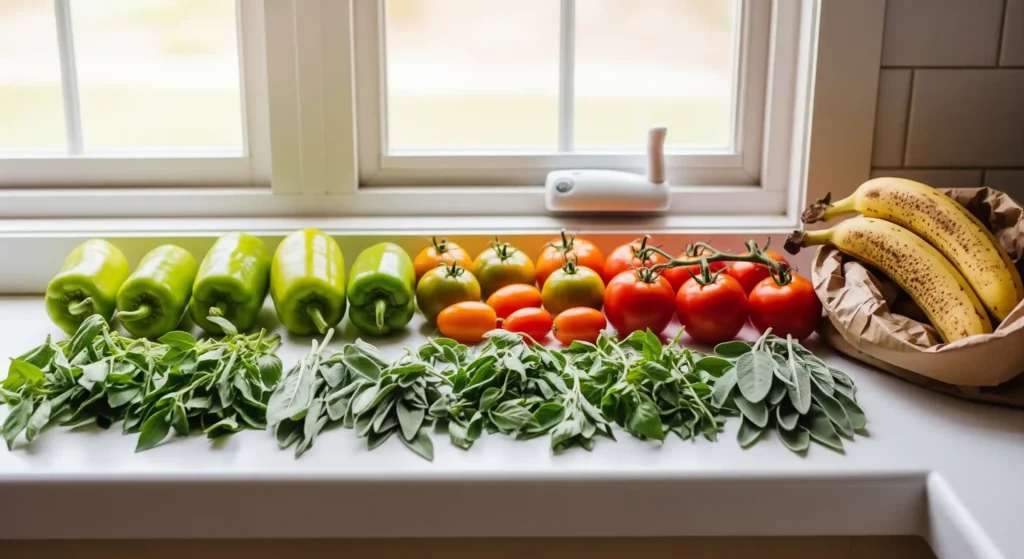
- Method 1: The Windowsill Method (For Almost-Ripe Fruit) For tomatoes already displaying some color change, this is ideal. Look for fruits with a whitish, star-shaped pattern on the bottom and that have changed from a deep, glossy green to a lighter, matte green. These are “mature green” tomatoes with the best possibility of maturing to a lovely red. Just set them on your kitchen counter or a sunny window sill. Don’t stack them; let them have some air circulation area. You should start to see them blushing within one week or two.
- Method 2: The Paper Bag or Box Method (For Bulk Ripening) This is more effective if you have more green tomato yield. Arrange a batch of green tomatoes—one layer is ideal—in a cardboard box or a big paper bag. Put an apple or a ripe banana in the container to quick things along. Natural ethylene gas, a plant hormone, released by ripe fruits sets off the ripening mechanism. To trap the gas, close the bag or box; check on them every few days. Eliminate the ones that have ripened; be sure to throw away those that indicate rotary tendencies.
- Method 3: The Old-Timer’s Trick (The Hanging Plant Method) This one seems like actual garden magic. Should a harsh frost be approaching you and you have limited time, you can gently pull off a whole healthy tomato plant. As much soil as you can from the roots, gently shake; then, hang the entire plant upside down in a cold, dry, dark location such as a garage or basement. Although the plant will gradually die back, in the process it will send all of its remaining energy and glucose toward ripening the fruit still attached to the vine. Just cut off the tomatoes as they become red over the next several weeks.
And how should your abundance be used? The opportunities are unbounded! Classic fried green tomatoes, tangy green tomato relish, or a zesty green tomato salsa call for firm green tomatoes. Pickling or chow-chow can call for the somewhat softer ones that lack complete ripeness.
The Great Cleanup: Eliminating and Disposing of Old Plants
It’s time to handle the plants themselves once you’ve gathered every single fruit. This is the most crucial action you can take to stop diseases in next year’s garden, not only to make your garden seem neat for the winter. Many common tomato diseases (including early blight, septoria leaf spot, and late blight) as well as pests can overwinter on old, diseased plant waste, simply waiting for the ideal circumstances to resurface and reinfect your garden next spring.
To Pull or To Cut?
Even if pulling the entire plant out—roots and all—there is a better approach. Most gardeners would rather cut the plant off at the soil line than pull. This leaves the ground-based developed root structure of the plant. Over the winter, these roots break down to supply earthworms and helpful soil bacteria food and organic debris. Without the great disruption caused by excavating a large root ball, this approach helps preserve healthy soil structure and aeration.
The Great Question: To Compost or Not to Compost?
This is a crucial choice totally dependent on the condition of your plants.

- If your plants were healthy: Bravo on a fantastic season! The disease-free vines are quite easy to slice and toss into your compost heap. Rich in nitrogen and a great supply of “green” material, they will help break down “brown” things like fall leaves.
- If your plants show ANY signs of disease: Should your plants exhibit ANY symptoms of disease—significant leaf spotting, stem lesions, wilt indicators, or the tell-tale fuzzy growth of late blight—you should not compost them. Usually, a household compost pile is not heated enough for long enough to kill these tenacious bacterial and fungal diseases. Composting them is like stocking a virus for next year. The best line of action is to bag the sick plants and toss them with your household garbage. When in question, toss it out.
Making the Bed for Winter: Your Future Garden Will Thank You
You have a neat, empty bed when the old plants are gone. Though it’s easy to walk away and ignore it until spring, doing a few last steps now will help you to be very successful next year. Imagine it as snuggling your garden into a long winter’s snooze.
Amend the Soil
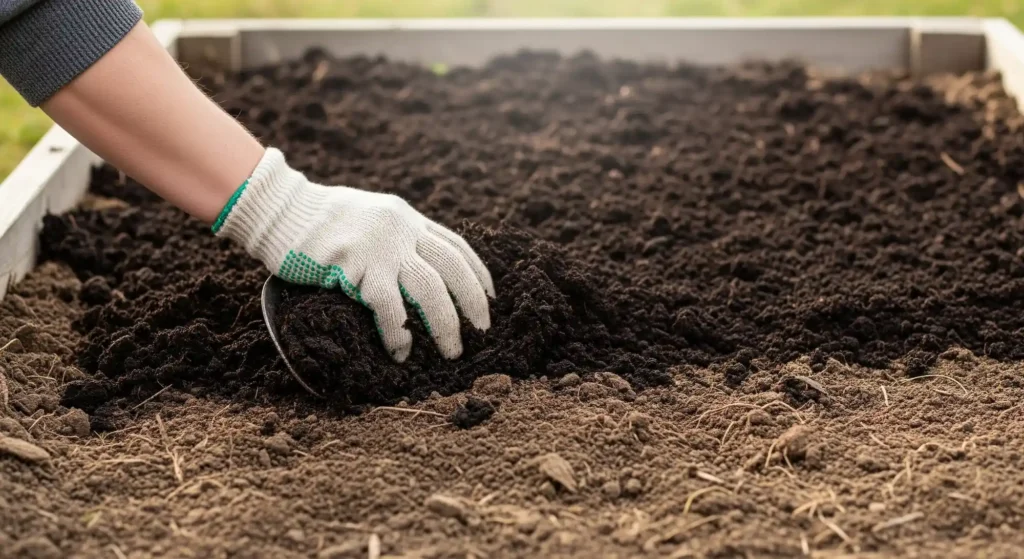
Your tomato plants ate rather heavily. All summer, they pulled nutrients from the ground to create that incredibly good fruit. This is the ideal moment to restore the soil and reward it for its efforts. Over the whole surface of the vacant bed, evenly distribute a substantial 2–3 inch layer of well-rotted manure or good-quality compost. You lay it on top like a blanket; there’s no need to till it violently. Earthworms, weather, and soil bacteria will work for you over the winter to mix into the ground.

Plant a Cover Crop (The Pro-Gardener Move)
Planting a cover crop will help you to raise the condition of your soil. This “green manure” really is a revolutionary change-agent. After changing, plant seeds of a winter-hardy cover crop such as red clover, hairy vetch, or winter rye. These crops simultaneously accomplish multiple incredible feats:
- They stop winter wind and rain-related soil erosion.
- They outcompete winter weeds for light and space, therefore suppressing them.
- When you flip them over in the spring, they reintrodu important organic stuff into the ground.
- Nitrogen-fixing legumes such as vetch and clover draw nitrogen from the atmosphere and store it in their roots, therefore offering your spring plants a free supply of fertiliser.
At Last, Closing the Loop on a Fantastic Season
From that last green tomato harvest to enhancing the soil for next year’s crop, you have now discovered that the end of the season is a busy and important period in the garden. This is a time to consider summer’s accomplishments and carefully get ready for the next season.
Knowing what to do with tomato plants at end of season turns a cleanup task into a strategic advantage so that the results of your effort go much beyond one summer and create conditions for much more success to come. These actions help you to actively engage in the lovely, cyclical character of gardening—harvesting, clearing, refilling, and resting.
Rest well, friend. Gardener. You rightfully earned it. Richer and healthier than it has ever been, your soil will be waiting for you in spring.
Frequently Asked Questions
May I save seeds from my tomatoes?
Indeed, totally, but with one significant exception: you should only keep seeds from heirloom or open-pollinated kinds. These will develop “true to type,” that is, the plant will resemble its parent exactly. Should you store seeds from a hybrid tomato, the subsequent plant will have an erratic genetic mix and probably lack the same amazing features.
How do I handle the tomato cages and stakes?
Not just chuck them in a heap! Preventing diseases mostly depends on you cleaning your supports. Clear all the dirt and any residual plant trash. To kill any adhering disease spores, it’s therefore a wonderful idea to wash them down with a disinfectant solution—like a 1:9 bleach-to—water ratio. Let them totally dry before packing them for the winter.
My green tomatoes are still hard like rocks. Will they ever ripen?
Depending on something. If they are really little and a deep, glossy green, they most certainly haven’t reached the “mature green” stage and won’t ripen completely either. These are ideal pickled or relish making prospects. The tomatoes with the best prospects are those that have turned a paler, hazy, or matte green and have reached their full size.
Can I plant tomatoes in the same spot next year?
You really should not do this. We call this exercise crop rotation. Year after year, planting tomatoes (or their close cousins like peppers, potatoes, and eggplants) in the same precise location can cause a notable accumulation of soil-borne diseases such blight and fusarium wilt. If at all possible, rotate your “nightshade” family crops to a fresh site in your garden on a 3-year cycle.
What should I do with tomato plants grown in pots?
The procedure is basically the same! Harvest the leftover fruit; clip the plant at the soil line; discard the vine (compost if healthy, trash if sick). Although you can recycle the old potting soil into your compost pile, to replenish it with nutrients and microbial life, it’s better to avoid using the exact same potting soil once more for tomatoes next year to help to prevent disease development in the container.
Little tomato seedlings are popping up where tomatoes fell. Should I let them grow?
We classify these as “volunteer” plants. Although they seem like a freebie, normally you should pull them out. Usually sprouting too late in the season, they yield no appreciable fruit before the first frost. More significantly, they can carry over illnesses from the parent plant; if they came from a hybrid variety, the fruit they produce would be an erratic (and usually unsatisfactory) surprise.
How should I handle the cover crop in the spring?
Just cut down the cover crop at its base about three to four weeks before you intend to start your spring garden. You can use a string trimmer, shears, or mower. After a few days of letting the leaves lie on the bed, flip it over into the top few inches of dirt. This lets the “green manure” begin to break down and release its nutrients of value right in time for your spring vegetables.
I struggled with pests like hornworms on my plants. Do I need to treat the soil?
Not generally for the pests themselves. The life cycles of most tomato pests will not be finished in the soil over winter in a manner that would benefit from treatment of the soil. But a light tilling of the soil in the fall or spring can reveal any overwintering pupae—such as those of hornworms or other moths—to predators and the cold environment. As always, your best defense is a complete clean-up of all plant trash at the end of the season since this eliminates their overwintering habitat.


