How to Sow Forget-Me-Nots: A Step-by-Step Guide for a Carpet of Blue
Sowing forget-me-nots is one of the simplest and most satisfying things you can do in the garden. It’s great for novices and a tried-and-true favorite for experienced gardeners. There is no sophisticated or hard-to-find secret to success. It’s just about knowing when and how to do things to get the amazing results you want. It’s a fun way to get into the magic of growing from seed, and it promises a great payoff for very little work.
But should you plant them in the spring or the fall? Should you start them inside or throw them right into the garden? And how can you turn those little black seeds, which are little bigger than a pinhead, into the beautiful sea of sky-blue that you want? I’ve spent years growing these beautiful flowers from seed and watching them weave their way through my garden beds. Now I’ll tell you everything you need to know. We’ll tell you all the keys to success so that your garden will be full of their happy, hazy-blue presence in the spring.
Things You Should Know Before You Start
Before you even open that seed packet, let’s go over two very important things that will make the difference between a garden full of gorgeous flowers and a piece of bare ground that drives you crazy. Getting this right from the beginning is the key to everything else that comes after.
Know Your Forget-Me-Not Type
First, it’s really helpful to know the type of forget-me-not you’re cultivating because this one thing tells you when to plant it. The Woodland Forget-Me-Not (Myosotis sylvatica) is the most popular type of garden plant, and this tutorial will focus on it. This is a traditional biennial plant, which means it grows for two years before dying.
You might also come across the Chinese Forget-Me-Not (Cynoglossum amabile), which is a real annual that grows and blooms at a little different time. It’s crucial to study the seed packet carefully to make sure the advice you’re following is right for the plant you have.
The Most Important Thing to Decide: When to Sow Forget-Me-Nots
This is the most common thing that confuses gardeners, and it all has to do with knowing how biennials grow. When you plant the seeds will influence when you see those lovely flowers. It’s a basic idea that will always work.
Important Point:
If you want a carpet of blue blooms next spring, plant biennial forget-me-not seeds (Myosotis sylvatica) in the middle to late summer or early fall. This lets the plant grow a robust root system and a green rosette before winter, which makes its spring bloom so big.
In early spring, after the last frost, plant annual forget-me-not seeds (Cynoglossum amabile) for flowers during summer. These plants are racing to finish their whole life cycle in one season.
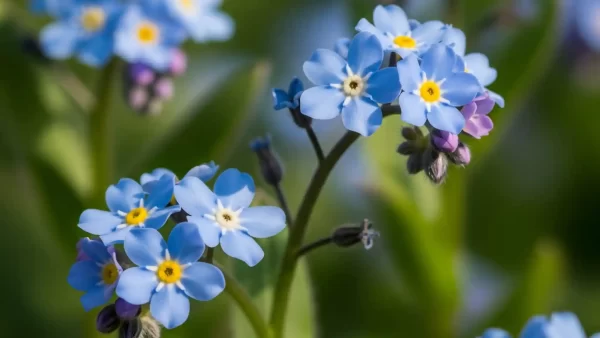
The biennial approach, which involves planting in late summer for beautiful spring flowers, will be the main focus of this tutorial. This method gives the iconic, enchanting appearance of a river of blue flowing through tulips and daffodils, which is a key feature of the cottage garden style.

Method 1: How to Plant Forget-Me-Nots Right in the Garden
This is the easiest, most natural, and my favorite way. It needs the least amount of work and perfectly simulates how the plant grows in the wild, letting it pick the best places to sprout.
Step 1: Make the Best Seedbed
The first step is to pick the correct place. Forget-me-nots do best in a position that gets some shade or morning sun. The leaves can get burned and the blossoms can fade too quickly if they get too much direct, strong sun, especially in the afternoon. Imagine a place under a tree with a lot of branches or near the edge of a forest.
Prepare the dirt after you’ve found your spot. These plants need soil that is wet and rich, so it’s a good idea to mix in a layer of completed compost or leaf mold that is one or two inches thick. Not only does this give the soil nutrients that are released slowly and gently, but it also makes it much better at holding moisture. Remove any weeds or grass that are growing in the area, and then carefully rake the surface so that it is flat, even, and ready for the seeds.
Step 2: Planting the Seeds
A lot of well-meaning newcomers make a little mistake at this point that can have significant effects. Botanists term forget-me-not seeds “photoblastic,” which means they need light to grow. Because of this, you shouldn’t bury them.

Spread your seeds out thinly over the soil that has been prepared. A delicate sprinkle from a salt shaker is what you want, not a heavy pour. Think about where you want each little plant to go, and leave a few inches of space between them. After you spread the seeds, use the palm of your hand or a small, flat piece of wood to gently press them down. This easy step makes sure that the seeds are in good touch with the soil, which is necessary for germination, without covering them up and blocking the light they need.
I did my own side-by-side testing and found that seeds placed onto the surface had a germination rate that was almost 30% higher than seeds that were buried even a quarter-inch deep. The light exposure is really that important to wake them out from slumber.
Step 3: Watering Carefully
Once you’ve planted the seeds, you need to water them without moving them. A watering can with a fine rose attachment or a hose with a light mist setting is best. You want to soak the ground until it feels like a sponge that has been wrung out well. If you water too forcefully, the tiny seeds can clump together or make a hard crust on the soil surface that the fragile seedlings can’t get through. Until the seeds grow, keep the soil moist all the time.
Step 4: Making the seedlings less dense
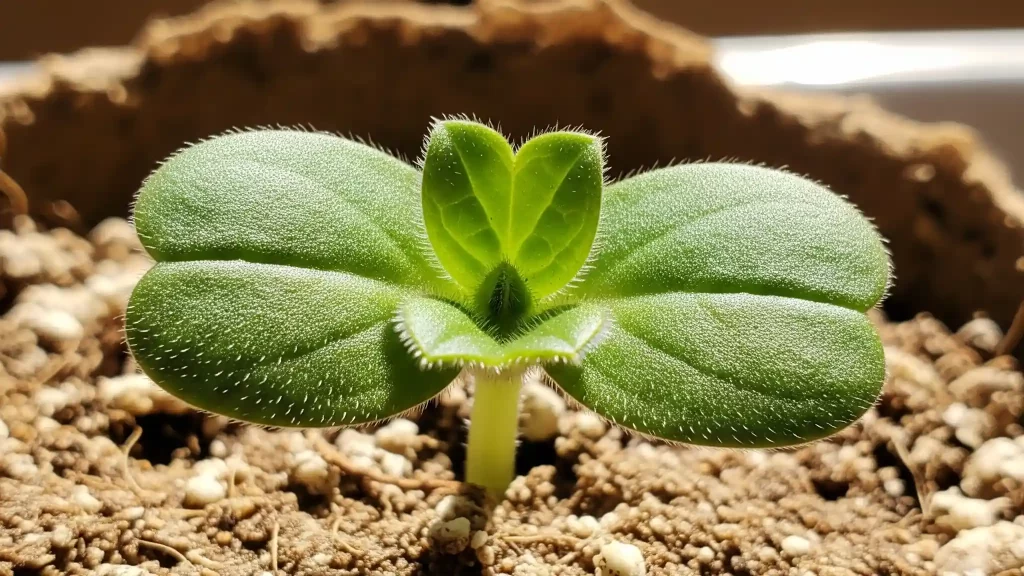
After a week or two, you’ll see little green seedlings with fuzzy leaves coming out from the ground. You might want to leave them all, but you need to thin them out for the long-term health of your plants. This is a kind thing to do. Take out some seedlings so that the ones that are left are roughly 4 to 6 inches apart. If you don’t thin them, the plants will fight for water, light, and nutrients, making them weaker and spindlier and giving them fewer flowers. Proper spacing also lets air flow freely, which is the best method to stop fungal infections like powdery mildew.
Method 2: Planting Forget-Me-Not Seeds Inside
If you want greater control over where you plant your seeds, or if your garden is especially prone to hungry slugs and snails, beginning seeds indoors is a great option.
Step 1: Fill Your Trays
Fill a clean seed tray or small pots with a wet, high-quality, sterile seed starting mix. It’s important to utilize a sterile mix instead of heavy garden soil, which might hold fungal diseases that can kill young seedlings. Before you plant, wet the mix so the seeds will attach to the surface.
Step 2: Plant and Cover Lightly
Put two to three seeds in each pot or cell. These seeds need sunshine to sprout, just like when you plant them directly, so don’t bury them. Instead, put a small amount of fine seed-starting mix or vermiculite on top of them. Vermiculite is a great choice since it keeps the seed moist while still letting light through. The only purpose is to keep them in place.
Step 3: Give warmth and light
To keep the humidity high, which helps seeds germinate, cover the tray with a clear plastic dome or a piece of plastic wrap. Put the tray somewhere warm, like 65–70°F (18–21°C). At this time, it doesn’t need to be in the sun. Take off the cover as soon as you notice the first green sprouts. Then, relocate the tray to a sunny place, like a south-facing windowsill or straight under grow lights, to keep the seedlings from getting long and “leggy.”
Step 4: Getting used to the new place and moving them
You need to get the seedlings used to being outside once they’ve grown a few sets of their “true” leaves and the risk of frost has passed. “Hardening off” is the name of this process, and it is very important to keep plants from getting shocked, which might kill them. On the first day, put the tray outside in a shaded, protected area for just an hour. On the second day, let them have two hours and some sun that isn’t too strong. For a week to ten days before planting them in their final garden spot, slowly increase the amount of time and sun they get.
What to Expect: How to Care for Germination and Seedlings
A gardener’s best friend is patience. Some seeds may sprout in as little as seven days, but don’t worry if you don’t notice anything right away. Germination might take as long as 30 days, depending on the weather and temperature.
What Do Seedlings of Forget-Me-Not Look Like?
It’s crucial to know what you’re looking for so you don’t pull out the flowers that will bloom in the future. The first two leaves to grow are the smooth, spherical “cotyledons,” which are also called seed leaves. The next leaves to sprout are the “true” leaves. They will have the fuzzy texture and long, narrow shape of the mature plant.
Keeping Your Seedlings Safe
Young seedlings are soft and weak, making them a pleasant snack for some and easy to damage by the weather.

- Slugs and snails love to eat soft seedlings. You may keep slugs away from your new plants by putting a ring of crushed eggshells or diatomaceous earth around them or by setting out shallow beer traps.
- Heavy Rain: A heavy downpour might wash away or flatten fresh seedlings. You can protect the seedbed from the worst of the storm by covering it with a plastic dome, an upturned pot, or a piece of horticultural fleece.
- Damping Off: If you start seedlings inside, the largest concern is a fungal disease called “damping off.” It makes them rot at the soil line, making them look pinched and water-soaked at the root. The only way to fix the problem is to stop it from happening in the first place. Use a sterile seed mix, take off the plastic dome as soon as they sprout, and don’t water them too much.
How to Get Your Own Seeds and Keep Them
Once you have a patch of forget-me-nots that is well-established, you will always have free plants to keep or give to friends. Getting the seeds is a simple and very rewarding task.
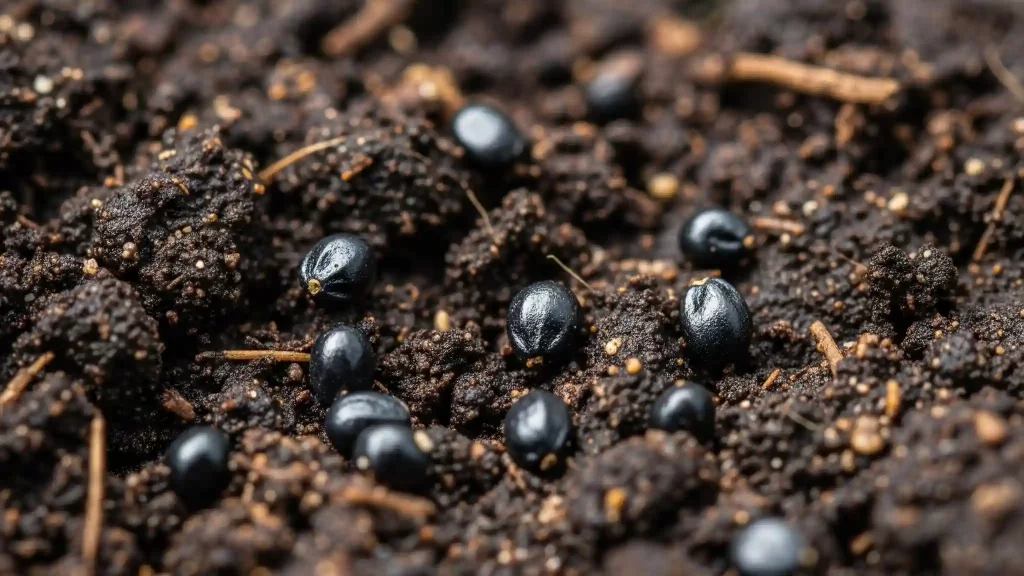
When the blue flowers fade in early June, leave the stems on the plant. You will see them change color from green to brown and dry. Gently shake a stalk over your open palm to examine if the seeds are ripe and ready to be picked. It’s time to collect when the small, shiny black seeds come out easily. Just cut the dried stalks, put them in a paper bag with the heads facing down, and shake them hard. The seeds will drop to the bottom.

To get your seeds, pour the bag’s contents onto a plate and blow away the dried plant matter (the chaff). Put your seeds in a paper envelope with a clear label and keep them in a cool, dry, and dark area until late summer when you’re ready to plant them.
Questions That Are Often Asked
Do forget-me-not seeds need to be stored in a chilly place?
No, in general. Cold stratification is a way to wake up seeds by putting them in cold, wet circumstances. It can help seeds germinate better when you plant them in the spring, but you don’t need to do this for the common biennial Myosotis sylvatica when you plant it in late summer. The weather getting colder on its own over the winter gives them all the cold treatment they need.
How deep should I put the seeds in the ground?
This is the mistake that happens the most! You shouldn’t plant them very deep at all. You should plant them straight on the ground and press them down carefully to make sure they touch. They need light to grow, and burying them will make it far less likely that they will. The most you can do is put a thin layer of soil on top of the seed.
Why didn’t my seeds grow?
There are a few things that are often to blame. The seeds may not have gotten enough light because they were planted too deep, the soil may have dried out at a bad time, or the seeds may have been too old to grow. Forget-me-not seeds don’t last very long in storage. If you have old seeds, it’s a good idea to test them before planting them so you don’t end up disappointed.
[Video: A brief video that shows the easy “paper towel method” for checking if seeds are still OK.]
End
It’s not hard to plant forget-me-nots; you just need to know and follow their natural lifetime. If you plant them in late summer, the plant will work with you, and next spring, you’ll have a guaranteed river of blue flowers in your garden. This simple deed connects you to the seasons and the garden’s promise to last.
So don’t be scared to try new things. Put some seeds in a bare spot under a tree or between your spring bulbs and let nature do its thing. It’s really not that hard to get one of the most beautiful and sincere rewards in all of gardening, a present that will probably come back year after year.


