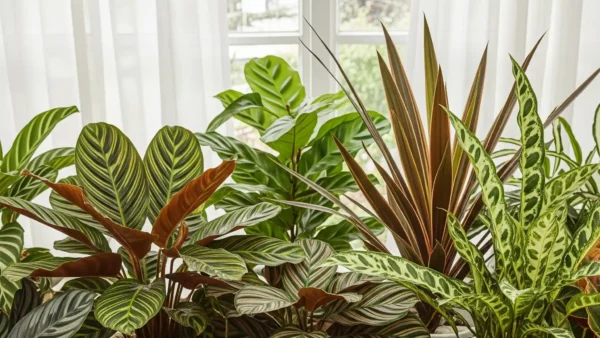
The Complete Calathea Care Guide: Expert Tips for Making Your Prayer Plants Grow (2025)
TL;DR (Too Long; Didn’t Read)
- Understand Their Language: Calatheas “pray” (raise and lower their leaves) daily. This movement, called nyctinasty, is a key health indicator. A plant that stops moving is stressed.
- Recreate the Rainforest: Success depends on mimicking their native environment: high humidity (60-80%), stable temperatures (65-85°F / 18-29°C), and bright, indirect light (100-400 foot-candles).
- Water Quality is Crucial: Tap water is toxic to Calatheas due to chlorine, fluoride, and mineral salts. Always use distilled water, rainwater, or reverse osmosis (RO) water to prevent brown, crispy leaf edges.
- Watering Method: Water only when the top 1-2 inches of soil are dry. Bottom-watering is the superior method to ensure even moisture and prevent pests.
- The Right Soil: Use a chunky, well-draining, slightly acidic soil mix. A combination of potting soil, perlite, coco coir, and orchid bark is ideal.
- Fertilize Gently: Feed only during the spring and summer growing season with a balanced liquid fertilizer diluted to 1/4 strength. Never fertilize a dormant or stressed plant.
Introduction: The Living Art of Calatheas
Have you ever thought about why the leaves of your calathea move around all day and fold up at night like hands in prayer? Or maybe you’ve had a hard time keeping these beautiful tropical plants alive and have seen their beautiful, complicated patterns disappear even though you’ve tried your best? You’re not alone, and I’m here to change that story totally.
I’ve worked with these beautiful plants for years, and I can tell you that calatheas aren’t only hard to care for as houseplants; they’re also complex living works of art that reward those who know how to meet their specific needs. You’ll learn why these prayer plants have won over plant lovers all around the world and turn your house into a thriving tropical oasis once you understand the science behind their behavior and how to take care of them properly.
The Science Behind Prayer Plants: What You Need to Know About Your Calathea
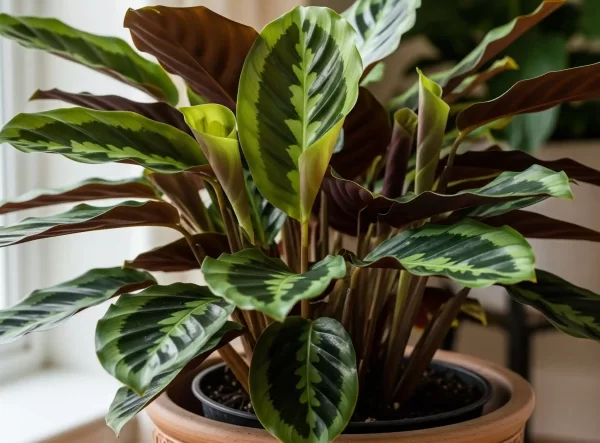
First, let’s talk about something really interesting: your calathea does a daily dance that has been refined over millions of years. This isn’t simply attractive; it’s a complicated biological process called nyctinasty. To become a calathea specialist, you need to know what it is.

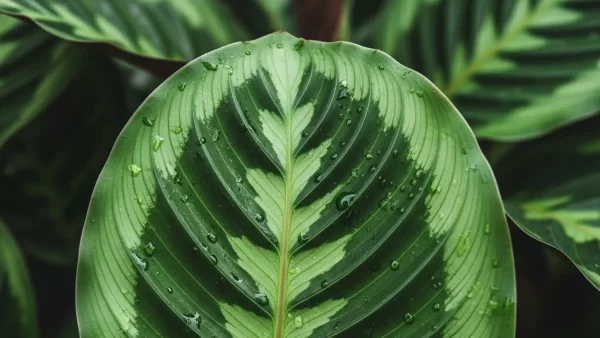
At the base of each leaf stalk on every calathea plant are swelling structures called pulvini. You may call these small biological machines that work with water. Cells on one side of the pulvinus vigorously pump potassium ions throughout the day when there is light. This makes water rush in through osmosis. This makes the cells swell up and creates turgor pressure, which makes the leaf descend and spread out to catch the filtered sunlight. As night falls and the light fades, the process starts over. The cells let go of their water, which lowers the pressure and makes the leaves fold up into the prayer position.
Why is this important for your care routine? This natural rhythm is how your plant talks to you most of the time. If your Calathea is healthy and happy, it will do a big, regular dance every day. Plants that don’t move around every day or whose movements slow down are often under a lot of stress. This is the first clue that anything is wrong with the lighting, watering, or humidity. It happens long before a brown patch or yellow leaf shows up.
I’ve learnt that watching how your calathea’s leaves move is a great way to tell how healthy it is. A healthy plant will move a lot every day, almost like it’s breathing with the rhythm of the day. Plants that are stressed might not entirely fold their leaves at night or retain them partially closed during the day. You just need to learn how to speak to your plant.
The calathea family came from the dark, wet floor of the South American jungle. They made these amazing changes to stay alive in an environment with dappled light, high humidity all the time, and soil that was always wet. Their roots are not very deep and are made up of fibers that help them swiftly soak up rain and nutrients from the thin layer of decaying organic materials. This evolutionary history explains why they are so picky about how they are cared for: they still live as if they are in a tropical rainforest, and it is our job to make that happen.
The Best Place for Calathea: Making Your Home Feel Like the Tropics
Making the perfect atmosphere for your calathea is like bringing a little piece of the Amazon jungle into your home. It may sound hard, but if you know the particular, measurable requirements, it becomes surprisingly easy.
Light Needs: More Than “Bright, Indirect”
Most guidelines say that calatheas need “bright, indirect light,” although this word is rather imprecise. Here are the exact measures and tests that will change the way you take care of your plants.
Your calathea does best at light levels between 100 and 400 foot-candles (fc). That’s about how bright it is when you read a book comfortably near a window that faces north or a window that faces east and is few feet back. If you really care about your Calathea collection, using a simple light meter (which you can get for less than $20) will take all the guesswork out of it and make your success rate skyrocket.
Most people don’t know this, but the brightness of the light has a direct effect on how bright the patterns on your calathea are.
- When there isn’t enough light (<100 fc), the plant will make more chlorophyll all over the leaf surface in a desperate attempt to photosynthesize more effectively. This will make the beautiful, detailed patterns fade and become muddy.
- Too much light (>400 fc or direct sun): The patterns may fade, and the leaves may even get burned, leaving brown, burned areas as the plant tries to defend itself from damage from the light.
Over the years I’ve been cultivating calatheas, I’ve come up with a seasonal positioning strategy that entails putting the plants closer to windows in the winter when it’s dark and farther away in the summer when it’s hot. In the winter, a place a few feet from a window facing south might be great, but in the summer, the same spot could be deadly.
If you don’t have a meter, you can use the “shadow test” to see how much light there is. Put your hand 12 inches above your plant while the sun is at its brightest. You should observe a soft shadow with edges that aren’t clear. You need more light if there isn’t any shadow at all. You need to transfer the plant right away if the shadow is sharp, dark, and has sharp edges. This means that there is too much direct sunlight.
Humidity: The Key Factor
Humidity is very important for calathea to grow well, but most people do it wrong because they try to raise the humidity without knowing how it affects pest control and the plant’s basic biological activities.
For your calathea to work effectively, the relative humidity needs to be between 60 and 80 percent. In most homes, especially in the winter when the heating is on, the humidity can drop to as low as 20–40%, which is like living in a desert. This big disparity is what makes the edges of leaves get crispy brown.
Low humidity makes it harder for your plant’s stomata to work. Stomata are microscopic holes on the bottoms of leaves that let gases in and out (CO2 in, oxygen out) and water out (transpiration). When the air is too dry, the stomata close to keep the plant from drying out. But this way of staying alive also stops the plant from “breathing,” which stops photosynthesis and growth. This leads to a chain reaction of issues, including slower growth, a higher risk of pests, and those well-known brown tips.
I’ve learnt this about humidity and keeping pests away: spider mites, the Calathea’s worst enemy, love hot, dry weather. Keeping the right amount of humidity in your home is important for your plants’ health and is also your best way to keep pests out. Spider mites don’t like it when the air is damp.
Here are the best ways I’ve found to deal with humidity:
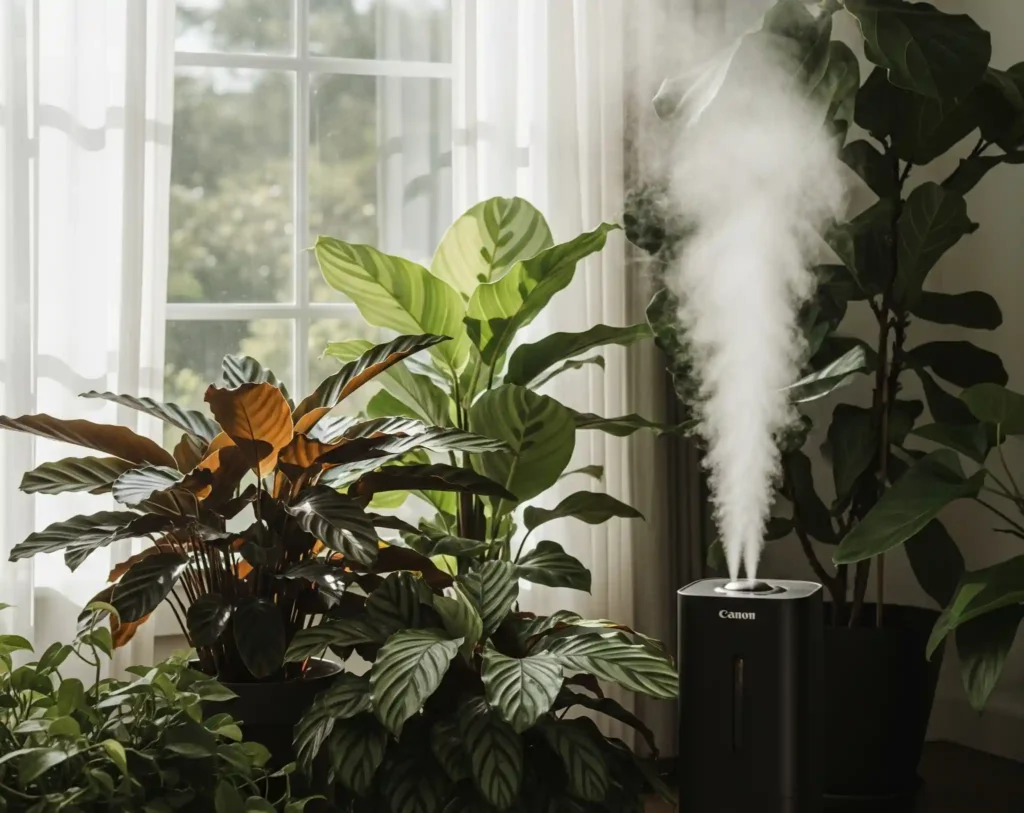
- Humidifiers: This is the best choice, especially ultrasonic “cool mist” types that provide a fine, steady mist. For best results, put them close to your plant groups.
- Grouping Effect: Put a lot of plants close together to make a bubble of natural humidity. Transpiration is how plants release moisture, and when you group them together, this effect is stronger, making the air around them more humid.
- Humidity Trays: A basic yet useful way to do things. Put a layer of pebbles or LECA and water in deep saucers, then put the plant pots on top of the pebbles. As the water evaporates, it makes the air around the plant more humid without the risk of the roots being too wet.
In my experience, it’s best not to mist calathea leaves directly. Water droplets on the leaves might cause bacterial and fungal problems if they stay there for a long time, especially if your air circulation isn’t optimal. It’s a risky activity with limited rewards.
Adjusting the Temperature and the Seasons
A Calathea cares more about how stable the temperature is than how hot it is. They like temperatures between 65 and 85°F (18 and 29°C), although they can handle a wide variety of temperatures as long as they stay stable and are kept safe from abrupt drafts.
Most individuals don’t know this: changes in temperature alter growth rates and cause distinct physiological reactions. Calatheas go into a semi-dormant state in the winter when the weather gets colder and the days get shorter. This is very normal and to be expected. They are not dead; they are just resting.
Your winter care plan should be a deliberate change from your summer routine:
- Less frequent watering: Soil that is colder takes a lot longer to dry out.
- Suspended fertilizing: A plant that is resting isn’t growing and can’t take the nutrients.
- More focus on humidity: Heating systems make the air inside quite dry, thus humidifiers are very important.
- To keep them safe from stress, keep them away from windows and doors that are cold and drafty, as well as heating vents that let in hot, dry air.
I’ve learnt that temperature stress can show up in small ways before it becomes clear. If the leaves stay partially folded during the day or don’t do its evening prayer movement, that’s an early sign that the plant is too chilly or has drafts.
Calatheas are very vulnerable to harm from the cold. Cell walls can break even after a short time at temperatures below 60°F (15°C), which can cause lasting harm. If you see black, see-through, or mushy spots on your leaves after a cold snap, get rid of them right away with a clean blade and move your plant to a warmer, more stable place.
The Goldilocks Way to Get Good at Watering Calathea
When watering calatheas, everything has to be precisely right, like in the story of Goldilocks. Too much water causes root rot, which can kill the plant, while too little water causes the leaves to curl up and get crispy. But here’s the secret: it’s not just how much water you have; it’s also how good it is and when you use it.
Water Quality: Why Calatheas Die in Tap Water
A lot of well-meaning calathea parents make mistakes here, but it’s not their fault because most care manuals don’t explain the science behind the plant’s water quality needs very well.
Calatheas are quite sensitive to minerals and chemicals that are often found in city tap water, especially chlorine, fluoride, and chloramines. The roots take in these substances from the soil and store them there. The plant can’t break them down, so it moves them to the leaves, where they build up in the tissues and cause a chemical burn that shows up as the brown tips and edges that so many indoor calatheas have.
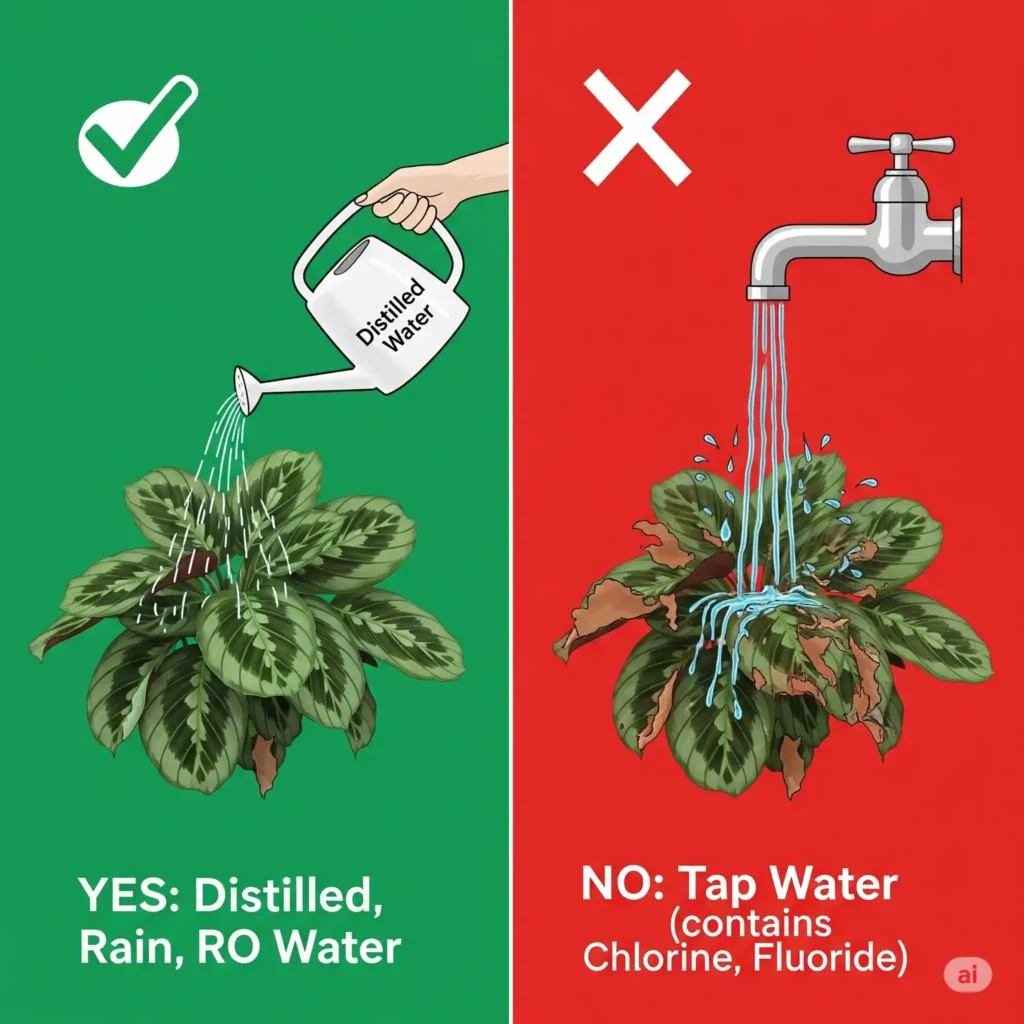
Fluoride poisoning is especially severe because it builds up over time. There is no way for the plant can get rid of the fluoride. Each time you water it, it adds more fluoride to the soil. Over time, this deposit becomes poisonous and kills cells (necrosis) that starts at the tips and edges of the leaves, where transpiration is strongest.
Calatheas do best in water with a pH of 6.0 to 6.5, which is a little acidic. Most tap water is made alkaline (pH 7.0–8.0) to keep pipes from rusting. Over time, this alkaline water makes it harder for the plant to take in nutrients from the soil, which makes it harder for the plant to get the micronutrients it needs.
Here are the water solutions I think work best, in order of how well they work:
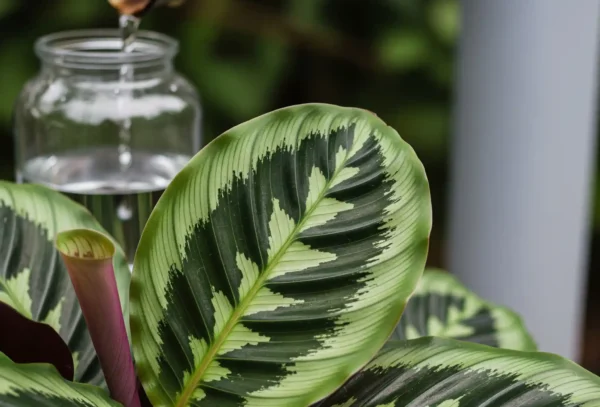
- Distilled Water: The best kind of water is distilled. It has a neutral pH and no minerals or chemicals, so it won’t change the chemistry of your soil.
- Rainwater: Nature’s best plant water is rainwater. It is soft, a little acidic, and has small levels of nitrogen that are good for you. I gather rainwater in containers that are safe for food during storms.
- Filtered Water: Use a carbon filter system (like a Brita pitcher) or, even better, a reverse osmosis (RO) system to filter your water. A basic carbon filter will get rid of chlorine and some minerals, but not all fluoride. An RO system takes out almost everything.
- Treated Tap Water: This is the last option. Let the chlorine in tap water evaporate by leaving it out in the open for at least 24 to 48 hours. It doesn’t get rid of fluoride or the more stable chloramines, but it does assist.
Here’s a suggestion from my years of experience: I use the water that my dehumidifier collects for my calatheas. It’s basically free distilled water, and your dehumidifier probably makes gallons of it every week when it’s humid. It’s a great, long-lasting way to get clean water.
How and How Often to Water
To water calathea plants perfectly, you need to know that they don’t want wet feet; they like continuous hydration. Their roots are shallow and fibrous, so they need water and air to stay alive and not decay.
This is how I always water my plants:
- The finger test is the most accurate way to do it. Put your finger 1 to 2 inches into the dirt. The top inch of soil for calatheas should feel a little dry to the touch, but the soil underneath should stay softly damp, like a sponge that has been wrung out. This usually means watering every 7 to 10 days during the growing season and every 10 to 14 days or longer in the winter.
- Always use water that is at normal temperature. Cold water can shock the delicate roots, making the plant droop and lose leaves. I always have a full watering can ready to go so that it is always at room temperature.
Ways to Water:
- Top-Watering: Slowly and evenly water the whole surface of the soil until the water flows freely from the bottom drainage holes. This makes sure that the whole root ball is wet and helps get rid of little amounts of salt that have built up. Don’t let your calathea sit in a saucer of water for more than 30 minutes.
- Bottom-Watering: In my experience, this procedure works quite well for calatheas. Put the pot in a tray of water that is at room temperature and let the soil soak up the water from the bottom for 30 to 45 minutes. This helps roots grow deep and strong and keeps water from lying on top of the soil, where it might attract pests like fungus gnats.
Pay attention to how your plant acts to adjust your watering schedule. During the day, leaves that wrap up tightly like cigars are begging for water. On the other hand, yellowing foliage and a musty, swampy smell coming from the soil are clear signals that you are watering too much.
Soil and Nutrition: The Building Blocks
The soil is the key to calathea success; it’s what everything else is built on. If you don’t do this right, no amount of perfect watering or humidity will save your plant from dying.
The Best Calathea Soil Mix
Calatheas need soil that can do a complex balancing act: it needs to hold moisture without turning into a thick, saturated bog, it needs to drain extra water rapidly, and it needs to let air into the roots. These tropical beauties don’t like potting mixes that are too heavy and hold too much water.
Calatheas like soil that is somewhat acidic, with a pH between 6.0 and 6.5. This pH range is best for taking in nutrients, especially the micronutrients like iron and manganese that keep those beautiful leaf designs bright.
This is the soil recipe that has worked for me over the years of trying and failing. Each part has a specific job to do:
- Base mix (40%): The base is made of high-quality, peat-based potting soil that gives the mix substance and basic nutrients.
- Perlite (25%): These tiny, white volcanic rocks are important for making air pockets in the soil. This helps with drainage and lets roots breathe.
- Coconut coir (20%): This fibrous substance is great at keeping moisture in while also letting water out, which gives it that “damp sponge” feel.
- Orchid bark (10%): This makes the drainage more chunky, helps with aeration even more, and recreates the conditions of the forest floor where Calathea roots would thread around decaying wood.
- Worm castings (5%): This is a natural, mild source of food and helpful bacteria that make the soil healthier overall.
This mix keeps the pH level slightly acidic that calatheas love while also keeping the right amount of moisture and drainage. If you wish to buy a mix that is already formed, check for ones that are made for aroids or African violets. These usually have the necessary qualities, but you might want to add some perlite to help with drainage.
As someone who has propagated plants before, I always make a lot of this soil mix and keep it in a sealed container. This makes plant care much easier and more consistent when you repot them. I’m ready to go when it’s time to repot.
Fertilizing for the Best Growth
Instead of intense fertilization, Calathea nutrition is about gentle, regular feeding. Keep in mind that these plants are used to getting nutrients from decomposing organic waste on the forest floor. The idea is to add to growth, not to compel it.
Feed your calatheas once a month with a balanced, liquid fertilizer during the growing season, which is from spring to early fall. I suggest utilizing a formula with a 20-20-20 NPK ratio, but you must dilute it to a fifth of its potency. It is much more harmful to over-fertilize than to under-fertilize.
Most folks get the micronutrients wrong. Calatheas need iron, manganese, and magnesium to develop well and have beautiful leaf patterns. Chlorosis, or yellowing between the leaf veins, and fading, dull patterns are signs that these areas are lacking. These are what you should find in a good quality, full fertilizer.
This is how I feed my plants during the different seasons:
- In the spring, start feeding once a month at a quarter strength as soon as you detect fresh growth.
- Summer: Keep feeding once a month during the time of year when plants develop the most.
- As growth slows down in the fall, cut back on feeding to every 6 to 8 weeks.
- In the winter, when the plant is dormant, stop fertilizing it totally.
Calatheas do great with organic choices. A “tea” created by soaking worm castings or compost in water or a very diluted fish emulsion gives plants moderate nutrients and helpful bacteria that make the soil healthier.
Based on what I’ve seen, these are some symptoms that you might be lacking in nutrients:
- Classic sign of iron deficiency (interveinal chlorosis): leaves turning yellow with green veins.
- Brown, dead spots that show up between the leaf veins are usually a sign of a lack of potassium.
- A lack of nitrogen usually causes the plant to be pale or light green all around.
- Small new leaves and stunted growth could mean that there isn’t enough phosphorus.
The Full Calathea Troubleshooting Guide
Calatheas might still have troubles even if you take great care of them. They are, after all, living things. The most important thing is to find out what’s wrong with your plant as soon as possible and to know what its leaves are trying to tell you. Let me show you the most typical problems and how to fix them.
How to Diagnose and Treat Leaf Problems
Calathea leaves are quite expressive; if you know how to read them, they’ll tell you exactly what’s wrong. Here is your complete guide to diagnosing:
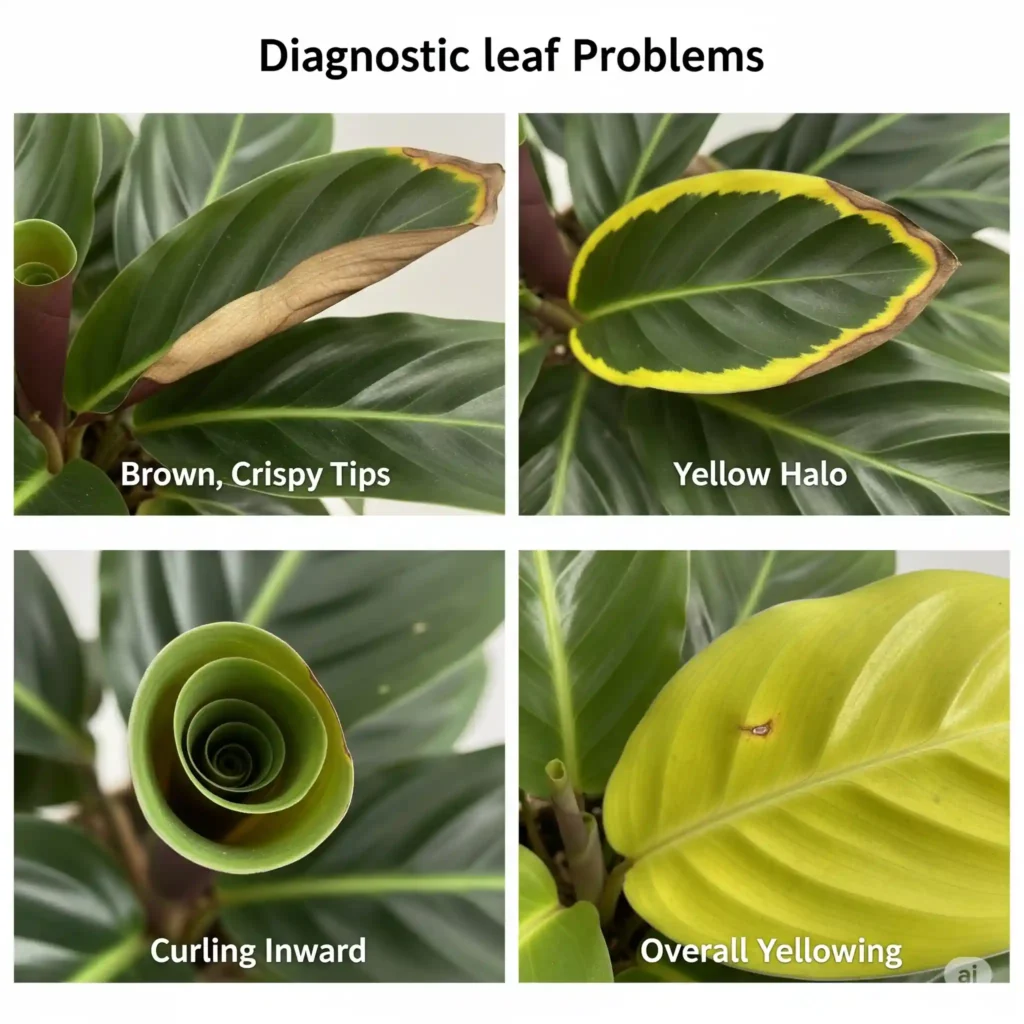
Brown Tips and Edges
People most often complain about brown tips and edges. This common ailment can have a number of different reasons, and you need to be a detective to figure it out:
- Low humidity (most common): The tips will go brown, dry, and crispy.
- Water quality problems (fluoride/chlorine): The edges will turn brown, and there will often be a clear yellow halo between the brown and the healthy green tissue.
- Too much fertilizer: Can burn the tips, and this is commonly followed by yellowing of the leaves and an abrupt drop in health.
- Underwatering: The tips will become brown, and the whole leaf will curl inward at the same time.
The way the brown tips change over time tells the story. If the browning starts at the tips and slowly spreads inward over weeks, it’s usually a problem with the humidity or water quality that lasts a long time. If you see big dark spots on the border of a leaf after watering, it could be fertilizer burn.
Curling Leaves
Leaves that curl up show that they are stressed for water, but not always in the way you think:
- When the leaves curl tightly during the day, like a cigar, this is a clear sign that the plant isn’t getting enough water. The plant is trying to keep water from escaping by shrinking its surface area.
- If your leaves don’t open up right in the morning, it could mean you’ve watered them too much. The roots are rotting and can’t take in water anymore, so even when the soil is wet, the plant is still thirsty.
- Gentle curling with brown edges: This means that the air is dry and the plant is under a lot of water stress.
Yellowing Leaves
Yellowing leaves can be a sign of a number of issues:
- A solitary lower leaf becoming yellow is a sign of normal aging (senescence). The plant is just dropping an old leaf to change the flow of energy. Don’t worry about it.
- The soil is wet and a lot of the leaves are turning yellow, especially the lower ones. This is a sure symptom of overwatering and root rot.
- Yellowing with clear brown spots can mean a fungal infection, which is commonly caused by bad air flow or water sitting on the leaves.
- Interveinal chlorosis is when the leaves turn yellow between the veins while the veins retain green. This is a clear symptom of a lack of nutrients, mainly iron or magnesium.
Fading Patterns
Fading patterns make me sad because these beautiful marks are what make calatheas so special:
- The whole pattern is slowly disappearing because there isn’t enough light. To make up for it, the plant is making extra chlorophyll all throughout.
- Sudden loss of pattern or bleaching: The leaves are getting too much direct sunshine.
- Older leaves may have less distinct patterns. This could be a normal aspect of the leaf’s aging process or a symptom of stress in the environment as a whole.
How I Plan to Address Each Problem:
- For brown tips, the first step is to figure out what caused them. If the problem is humidity, use the steps above to raise the moisture levels. You can also cut off the brown portions with clean, sharp scissors for cosmetic reasons. If the water quality is bad, switch to distilled water right away and do a soil flush with distilled water to get rid of mineral buildup.
- If your leaves are curling, check the soil moisture first. Water the soil well if it is dry (bottom-watering is ideal for this). You need to check for root rot if the soil is damp and change how often you water in the future.
- For leaves that are becoming yellow, cut them off at the base to stop the disease from spreading. After that, look into the roots. If the roots are black and mushy, they are rotting and need to be repotted right away in new soil.
Managing Pests: Prevention and Treatment
That’s good news because calathea pests are predictable because that makes it easy to stop them. The most important thing to remember is that most pest problems are driven by stress in the environment. A plant that is healthy and happy is significantly less likely to have pests.
- Spider mites are the most prevalent pests that attack calathea. They like hot, dry, and low-humidity places. These small spiders make thin, silky webs on the undersides of leaves and in the spaces where leaves meet the stem. When they feed, they stab plant cells and suck out the contents. This leaves small yellow or white dots on the leaves, which is called stippling.In warm weather, the life cycle of a spider mite lasts only 7 to 10 days, from egg to adult. This is very important for when to start treatment. You can’t get rid of them by just spraying once. You need to treat them every 3 to 4 days for at least 2 to 3 weeks to break up their reproductive cycle.
- Mealybugs seem like white, cottony clusters in the joints of leaves and the cracks in stems. They multiply more slowly than spider mites, but they are harder to get rid of because they hide in safe places and have a waxy coating that keeps some sprays from working.
- Thrips are little, thin insects that leave black spots of poop on leaves and make them look like they have silver stripes on them. They are especially bad because they can fly and spread swiftly, and some types can carry plant diseases.
- Scale insects are little brown bumps that don’t move and look like bumps on stems and leaves. It’s really interesting how they make a hard shell to protect themselves and feed by sticking needle-like mouthparts into plant tissues.
I think quarantine procedures are really important. For at least 2–3 weeks, keep any new plant you bring into your home in a different room than your other plants. Check it every week during this time for any signs of pests and treat it if necessary. This one step can keep you from getting a huge infestation later on.

How I Cure an Active Infestation Naturally:
- Isolation: Take the sick plant away from the other plants right away to stop the spread.
- Physical Removal: To get rid of mealybugs and scale, use cotton swabs bathed in rubbing alcohol to break down their waxy coverings and wipe them away. A powerful spray of water in the shower can get rid of a lot of spider mites.
- Spray Treatment: Use insecticidal soap or a neem oil solution to spray the whole plant, including the tops and bottoms of the leaves, the stems, and the crevices. Do this again every three to four days to kill any pests that have just hatched.
- Environmental Control: After treatment, put the plant in a place with high humidity and good air flow to make it less inviting to pests.
- Monitor: Check the plant every week for 6 to 8 weeks after the last evidence of pests to make sure they are really gone.
To get rid of pests, you need to be consistent and patient. A lot of people cease treatment too soon, after not seeing any pests for a week, and then the eggs that are still alive hatch and the population grows again.
Advanced Ways to Grow Calathea
One of the best things about being a plant parent is propagating calatheas. Making new life from your favorite plants is magical, and calatheas give the adventurous gardener many ways to do this.
Step-by-Step Success with the Division Method
Division is the most popular and reliable way to propagate calatheas, although timing is key. The optimum time to divide is when you usually repot in the spring, when the plant is getting ready to develop and has the energy to heal.
Here is how I divide things up step by step to make sure it works:
- Preparation: Stop watering for three to four days before you want to divide. It’s easier to work with and less untidy when the soil is a little dry. This lowers the chance of damaging the roots. Get your work area ready by laying down a clean tarp, sterilizing your instruments (a sharp knife or hori-hori), mixing up some new soil, and getting pots that are the right size for your new divisions.
- Assessment: Carefully take the parent plant out of its pot and shake off any extra soil to reveal the root ball and rhizome structure. Find natural growth sites or clumps. These are the groups of stems that are coming out of the rhizome. For a new division to be able to grow, it needs its own strong root system and at least two or three stems with a lot of leaves.
- Division: To divide, use your clean, sharp knife to make clean cuts into the rhizome, separating the bunches you found. I dip my knife in a 10% bleach solution or rubbing alcohol between cuts to keep soil-borne illnesses from spreading between divisions.
- Root Evaluation: This is a very important phase. Check the roots of each fresh division. Roots that are healthy should be white or light tan, feel firm, and smell like dirt. If the roots are black, mushy, or smell bad, they are rotting and need to be cut off completely using your clean tool. If you see a lot of rot, you can allow the cut ends of the rhizome dry out and harden for a few hours before planting.
- Planting: Use your new divisions to fill tiny pots with your fresh, well-draining soil mix. You might want to give them a big pot to expand into, but that’s not a good idea. If the pot is too big, it will hold too much water, which makes it more likely that the plant will rot before the new, smaller roots can grow.
- After-Care: New divisions are weak for the first 4 to 6 weeks as they recuperate from the shock and grow new roots. This is the “ICU” stage. Keep the humidity very high (70%–80% is best; you can use a humidity dome or a clear plastic bag held up by pegs). Keep the soil moist but not soggy, and put them in warm, bright, indirect light. Don’t fertilize until you see clear signs of new, active growth.
In my experience with propagation, smaller divisions tend to grow faster than bigger ones. When you split things up, don’t be greedy. It’s better to make a lot of little, healthy plants that grow back rapidly than one big, sick division that might fail. If you are patient throughout this time, you will get robust, healthy young plants.
Choosing and Caring for Specific Types of Calathea
The calathea family has a lot of different types. The Medallion has bold, dramatic patterns, while the Musaica has subtle, refined patterning. Knowing what each type of plant needs and how it behaves can help you pick the best plants for your skill level and the environment you live in.
Common Types and What They Need
- Calathea Medallion (Goeppertia veitchiana): People generally fall in love with this one initially, and for good cause. The dark green leaves with their tiered, feather-like patterns of cream, light green, and pink, all with a rich purple underside, are simply amazing. This kind is not too hard, so it’s great for an intermediate plant parent who knows the basics. To keep their design strong, medallion calatheas need bright, indirect light. They’re very sensitive to the quality of the water; I’ve seen more medallions ruined by tap water than any other common type. The silver and pink marks will fade if there isn’t enough light, but the leaves will burn right away in direct sunlight.
- Calathea Orbifolia (Goeppertia orbifolia): This is the most exquisite and complex member of the calathea family. Its big, spherical, leathery leaves with their simple yet dramatic silver stripes make it look almost like a building in any room. They are easier to take care of than their dramatic look might suggest. Orbifolia plants can handle a little less humidity than most other calatheas, which makes them great for beginners who want to attempt their first “fancy” plant. But they need more room because their big leaves need sufficient air circulation to keep fungus from growing, so don’t crowd them.
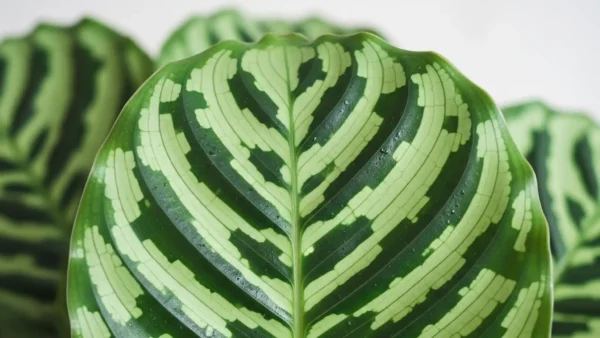
- Calathea Lancifolia (Rattlesnake Plant): Perhaps the most tolerant and hardy type of calathea. This makes it a great plant for novices. You can tell it right away by its tall, wavy-edged leaves and striking spotted patterns. In my opinion, lancifolia kinds can handle lower humidity levels better than other calatheas and don’t mind when the water quality isn’t always perfect. They can also handle small changes in temperature better, which makes them great for domestic conditions that aren’t as controlled.
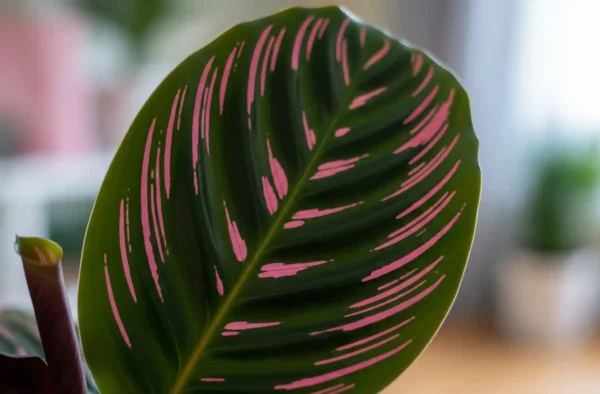
- Calathea Ornata (Pinstripe Plant): The patterns on this plant are some of the most beautiful and exact in the plant world. The soft, precise pink or white lines on the dark green foliage make the plant look sophisticated and almost like a shape. But this beauty has a cost. Ornata types are some of the hardest calatheas to care for since they need high humidity and perfect water quality all the time to keep the pinstripes from fading and the leaf edges from turning brown. They are also known for growing very slowly, which can be difficult for plant parents who want things to happen quickly.
To help you pick, here’s my care chart for each type:
| Different types | What Light Needs | Wetness | Sensitivity to Water | Hardship |
|---|---|---|---|---|
| Medallion | Bright but not straight | 65 to 75% | Very | Middle |
| Orbifolia | Indirectly moderate | 60 to 70% | Not too much | Start |
| Lancifolia | Bright but not straight | 60 to 70% | Not high | Starting out |
| Ornata | Bright but not straight | 70 to 80% | High | Advanced |
I always tell newbies to start with the lancifolia or orbifolia types. They’re forgiving enough to let you make mistakes while still giving you that amazing calathea experience. Advanced collectors might relish the challenge of types like the famous Calathea “White Fusion” or the soft Calathea warscewiczii. These plants have unique patterns but need expert-level care and a precisely controlled environment.
A Seasonal Care Calendar for Calathea That Works All Year Long
Taking care of calathea isn’t always the same; it changes with the seasons. Knowing these natural patterns can make you much more successful. Let me show you how to make seasonal changes that will keep your calatheas healthy all year long.
- Spring (March to May): Calatheas wake up. As the days become longer and the weather gets warmer, your plants will start to sprout new leaves and flowers. This is the best time of year to repot plants. If their roots are stuck, check them and transplant them to containers that are a little bigger. When new growth starts to show up, start fertilizing again once a month at a quarter strength. As the plants are more active and their metabolism speeds up, you should water them more often. This is also the best season to propagate because spring divisions grow swiftly in the warmer weather.
- Summer (June to August): The best time for plants to grow. Your calatheas should be growing new leaves all the time and displaying off their most colorful patterns. At this point, the right amount of humidity is quite important because air conditioning can lower the humidity levels inside a lot. Stick to a regular watering schedule, but be ready to water more often while plants are growing and losing water in the heat. Keep up your monthly fertilizing, but always look for symptoms that you’ve over-fertilized, like brown tips on the leaves. It’s also very important to manage light in the summer. The sun is high and bright; what was wonderful light in the spring can be too much by July.
- Fall (September to November): The dormancy period starts. As the days get shorter and the weather gets cooler, growth slows down a lot. As a result, you should start watering less often and stop fertilizing altogether by the end of October. This is a great time to take care of your plants. Gently remove any leaves that are damaged or yellowing, and use a soft, wet cloth to brush the dust off the leaves so they can absorb more light. Also, check for any bug problems before winter sets in.
- Winter (December to February): Calatheas take a break. The plants will almost stop growing and go into a semi-dormant state. This is when most calathea die because people keep doing the same things they did in the summer. Cut back on watering a lot; the soil should have more time to dry up between waterings. Stop giving plants food. To make up for the very dry air inside that heating systems make, pay more attention to the humidity levels. Put plants where they can get some of the little winter light that is available, but keep them safe from chilly breezes from windows and hot, dry blasts from heat sources.
In my experience, keeping a seasonal care notebook helps you see patterns and improve your approach. Pay attention to when you notice the first new leaf of spring, when the leaves start to fold differently in the fall, and how your plants react to the changes you make to their care. You will become a true Calathea specialist with this information year after year.
Things People Get Wrong About Taking Care of Calathea
I’ve been treating individuals with their calatheas for years, and I’ve found that several myths keep coming up that do more harm than good. Let me clear up these prevalent misunderstandings.
- Myth: You can’t grow calatheas inside.
- Reality: Calatheas can perform quite well indoors, even though they are hard to care for and don’t forgive mistakes. Instead of treating them like a normal, easy-care houseplant, you need to know what they need and make sure their environment is stable.
- Myth: The easiest approach to raise humidity is to mist.
- Reality: Misting simply raises humidity for a short time and can even make things worse. When water droplets sit on the fragile leaves, they can cause fungal and bacterial infections, especially in houses with bad air circulation. A humidifier is a much better choice.
- Myth: You have to keep calatheas wet all the time.
- Reality: They need soil that is consistently moist, not soggy and full of water. Overwatering is far worse than underwatering since it can kill plants by causing root rot. The idea is for the soil to be like a sponge that has been squeezed out, not a swamp.
- Myth: If the tips of your leaves are brown, it means you aren’t watering them enough.
- Reality: Brown tips are most typically caused by low humidity or bad water quality (minerals and fluoride in tap water). If the problem isn’t underwatering, watering more often will make it worse and produce root rot.
- Myth: Calatheas don’t need fertilizer.
- Reality: The truth is that they are light feeders and can live for a while on the nutrients in their soil. However, they need regular, gentle fertilization during the growing season to keep their patterns bright, help them grow healthily, and keep them from running out of nutrients.
These misunderstandings typically come from good counsel that isn’t complete. If you know the science behind caring for calathea, you may make better choices instead of just following general houseplant regulations that don’t apply to these tropical plants.
Frequently Asked Questions
What makes calathea leaves coil up at night?
Nyctinasty is a normal and healthy activity. Pulvini, which are specific structures at the base of the leaves, control it. They respond to variations in light. At night, leaves fold up to keep moisture in and maybe defend themselves. During the day, they unfold up to let in light for photosynthesis. A plant that is “praying” a lot is usually a healthy one.
Can I use water from the faucet for my calathea?
It’s not a good idea. Chlorine, fluoride, and other minerals that build up in the soil over time are found in most tap water. These minerals can produce chemical burns on the leaves, which makes the tips and edges turn brown. For the best results, use distilled water, rainfall, or water that has been purified with reverse osmosis.
When should I repot my calathea?
You should repot your plant every two to three years, or when the roots are so tightly wound that they are circling the bottom of the pot or coming out of the drainage holes. When the plant is during its active development period, spring is the greatest time to repot it because it can recover quickly.
Why are the leaves on my calathea going brown?
Brown tips and edges usually mean there is a problem with the environment, such low humidity, bad water (like tap water), or too much fertilizer. Brown stains in the middle of a leaf could mean that it has a fungal illness or has been damaged by pests. Before you can treat the problem properly, you need to know what caused it.
Is it safe for pets to be around calatheas?
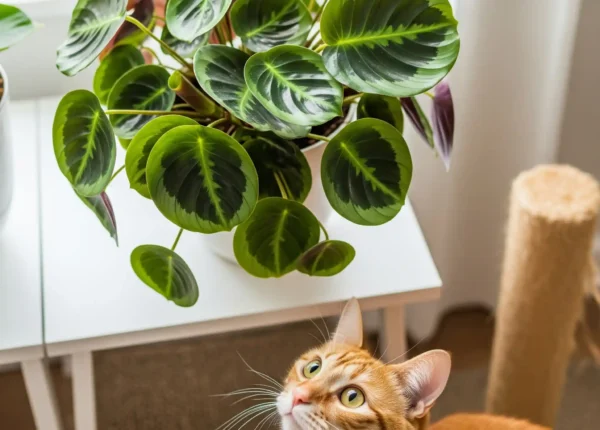
Yes, all plants in the Calathea genus are safe for cats, dogs, and other common pets, which is great news for families with pets.
What is the ideal level of humidity for calatheas?
The best humidity level is between 60 and 80 percent. Most homes have much lower humidity levels, between 20 and 40 percent, especially in the winter. To keep them happy, you’ll probably need to use humidifiers or other ways like pebble trays.
How can I tell if my calathea needs water?
Don’t trust a schedule. The best way to be sure is to touch the top inch of soil with your finger. Time to water if it feels dry. If it seems wet, give it another day or two. When the plant gets thirsty, the leaves will also start to curl a little.
Why isn’t my calathea getting bigger?
If your plant’s growth is slow or has stopped, it could be because it doesn’t get enough light, it doesn’t get enough water, it doesn’t get enough nutrients, or its roots are having troubles. It’s also crucial to understand that Calatheas grow more slowly than other plants, like Pothos. In the winter, they go into a natural hibernation phase where they don’t grow at all.
Sources
- Minorsky, P. V. (2019). The functions of foliar nyctinasty: a review and hypothesis. Biological Reviews, 94(1), 216–229. https://pmc.ncbi.nlm.nih.gov/articles/PMC7379275/
- Comprehensive review of nyctinasty, confirming the adaptive significance and physiological mechanisms behind daily leaf movement in Calathea and related species1.
- Lin, Y.-H., Hsu, Y.-T., & Kao, C.-H. (2018). Biochemical and Physiological Characteristics of Photosynthesis in Plants of Two Calathea Species. International Journal of Molecular Sciences, 19(3), 704. https://www.mdpi.com/1422-0067/19/3/704/pdf
- Frontiers in Plant Science. (2018). Leaf Movements of Indoor Plants Monitored by Terrestrial LiDAR. https://pmc.ncbi.nlm.nih.gov/articles/PMC5829619/
- MDPI Water. (2018). Quantification of Daily Water Requirements of Container-Grown Calathea and Stromanthe Produced in a Shaded Greenhouse. https://www.mdpi.com/2073-4441/10/9/1194/pdf?version=1536140484
- Provides quantitative data on Calathea water needs, supporting the importance of careful watering and the risks of over- or under-watering6.
- Hindawi. (2014). Micropropagation of an Exotic Ornamental Plant, Calathea crotalifera, for Production of High Quality Plantlets. http://downloads.hindawi.com/journals/tswj/2014/457092.pdf
- Details Calathea’s sensitivity to environmental stress, substrate, and water quality, reinforcing the need for proper soil and water practices7.
- JFA Sri Lanka. (2018). Effect of Growth Regulators on In-vitro Shooting of Calathea ornata for Commercial Cultivation. http://jfa.sljol.info/articles/10.4038/jfa.v11i2.5214/galley/4209/download/
- Explores propagation techniques and the importance of substrate and environmental control for healthy Calathea growth8.
- Ceylon Journal of Science (Bio. Sci.). (2010). Maturity at harvest affects postharvest longevity of cut Calathea foliage. http://cjsbs.sljol.info/articles/10.4038/cjsbs.v38i2.1856/galley/1546/download/
- Investigates leaf longevity and physiological responses, relevant to understanding leaf health and environmental stress9.
- MDPI International Journal of Molecular Sciences. (2001). Molecular Approach to the Nyctinastic Movement of the Plant Controlled by a Biological Clock. https://www.mdpi.com/1422-0067/2/4/156/pdf?version=1403128960
- Explains the molecular and circadian mechanisms behind nyctinastic movement, supporting the biological basis for Calathea’s daily leaf motion10.
- Springer. (n.d.). Regulatory Mechanism of Plant Nyctinastic Movement: An Ion Channel-Related Plant Behavior. https://link.springer.com/10.1007/978-3-642-29110-4_5
- Reviews the role of ion channels and potassium flux in nyctinastic movement, relevant to the physiological explanation of Calathea leaf behavior11.


